Table of Content
Ever looked at a pretty site and wondered how it became so magical in appearance, even in God's name? Many people would have faced this situation wherein they saw a website and wondered whether they could ever create such a website for their business.
Let me tell you that it is very simple to prepare such a website. It all starts with a design file in Photoshop, commonly known as PSD. It then converts into something that creates magic - on WordPress.
Now, you might wonder if creating such a website might be very challenging. Guess what? It is very easy to follow. Anyone can follow these instructions and convert PSD to a responsive WordPress website.
What Is PSD and WordPress?
Now that you are here, let’s start with something quite basic: what are PSD or Photoshop design and WordPress if you don’t already know them:
◾ PSD: PSD is a short form of Photoshop documents. It is a file format that Adobe Photoshop uses to store Data. PSD files contain numerous details, and they have several layers. It can include links, text, images, shapes, and other items that form the layout of a website.
◾ WordPress: WordPress, however, is a Content Management System or CMS. It lets you work with and share content on your website without having a massive amount of knowledge of HTML. WordPress adds interactivity and interactivity to the design you have planned and transformed into this layout.
In simple terms, PSD is just the look and feel of the website, which is like the blueprint of a house, while WordPress is where everything operates.
Guidelines to Convert PSD into Responsive WordPress
Now that you understand the differences between PSD and HTML let us look at how to convert PSD to WordPress.

Step 1: Understand Your PSD File (It's More Than Just a Picture)
You have your design all set up in Photoshop, correct? That is the basic idea, but it is time to narrow it down. Of course, headers, buttons, and images must be logically read before any other element of the design.
So, when considering PSD, imagine it as a plan or architectural drawing of the construction you will build. It has a specific look and feel and combines layers that present different parts of your website.
Before converting the design to WordPress, it is important to evaluate it carefully. This means what it is, like the header section, the navigation bar, images, or the content segments. This way, you have a very clear guideline on how to go about coding.
Tip: Divide your design into the main areas and decide which would require interactivity, such as buttons or links.
Step 2: Slicing Your PSD (Well, It is Just Cutting, but Let’s Leave All Those Technicalities to Photoshop)
After analyzing your PSD, the next step that needs to be followed is slicing. This means that by cutting your design into smaller images that will be used on your website, small images are much easier to load than large ones. For instance, if you have a logo at the top or custom buttons, all these must be saved as images.
But please do not overemphasize slicing! The fewer images you place on a given web page, the shorter it will take your website to load, positively impacting user experience and SEO. Use the right format— save photographs as JPEG and logos or icons as PNG.
Pro Tip: Loading speeds are much faster with smaller file sizes; thus, compress your images as much as possible.
Step 3: Convert Your Design to HTML and CSS (Yay! We Are Halfway Through!)
Now that you have sliced your PSD, it’s time for a little magic and turn your design into code. No panic is needed if one is not well-versed in computer programming. Do not worry; there are overviews and checklists to choose from.
HTML is used in the content area of your website. On the other hand, CSS is used to make your similar look similar to PSD.
Here’s what you should be aware of:
➔ HTML determines the layout of your site. This is quite similar to how any other structure has its framework; think of it as the skeleton of your website.
➔ CSS can be made as pretty as you want it to be. It is what dictates the fonts, colors, and flow of the content, making your design come to life.
In HTML, you add the parts of the design if they exist, such as headers, sidebars, and footers. You then style them with CSS to look as they do in your PSD layout or design.
Pro Tip: Apply modern CSS frameworks such as Bootstrap or Flexbox to make this process easier if you are still learning to code.
Step 4: Making the Site Responsive (No Pinching or Zooming Necessary!)
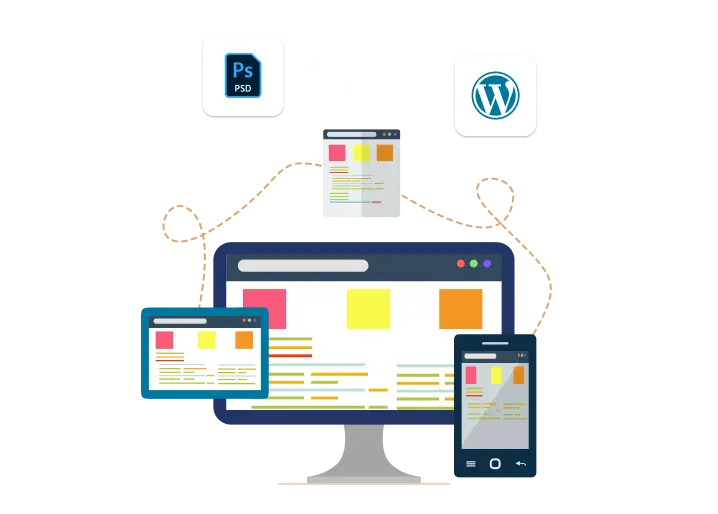
Think about being on a web page on your mobile phone; all you can see are tiny letters you must expand just to read. Gone are the days when companies create websites now that are not responsive to the actions taken by their audience.
The good thing about responsive websites is that the audience can view them across different devices and still find them faultless. These devices range from desktops, tablets, and even mobile phones. When you decide to convert PSD to responsive WordPress Media, a set of rules called queries in CSS must be adhered to.
Here’s how to think of it: on a larger screen, for example, your navigation bar might exist as a long horizontal bar with various menu options, but on a mobile phone, it could turn into a tiny icon. It de facto implies that the site is simply told how it should look depending on the device, or rather, the screen size and orientation.
Use any of these free responsive themes to create an amazing responsive WordPress website:
● Responsive
● Mantra
● Photo
● Twenty Eleven
Pro Tip: You must occasionally take the time to test your website across different devices. You can utilize tools like Google’s Mobile-Friendly Test to learn more about the site's work.
Step 5: Time to Integrate with WordPress
Having designed and coded your site with HTML and CSS, here is how to get your site under WordPress like a champ. WordPress will take you through all the dynamic elements, such as creating new posts, adding new pages, or even starting a blog without coding each time.
You will convert your HTML files into a WordPress theme to do this. A WordPress theme is a PHP files folder that defines a WordPress website's appearance.
● header.php – Controls the content of the header section of your site.
● footer.php – Responsible for controlling the footer.
● index.php – The body template where the main content is placed.
This is where your PSD to WordPress conversion process begins to form as the HTML structure is converted into a full-fledged website.
Step 6: Use WordPress Functions (It’s Like Magic… But They Created a Code for That!)
WordPress is powerful because it has functioned at the back end, taking care of most of the work for you. You do not need to update every page as a new blog post is created – WordPress does it independently.
Let us now look at some valuable functions:
● the_title(): This shows the title of a post or a page.
● the_content(): Shows the body of a post.
● get_header(): Automatically inserts the header template.
These functions help in making your site to be more adaptive and versatile. For example, when you add a new post, WordPress will change the homepage without programming to display that post.
Step 7: Test and Debug (No Room for Errors)
The process does not end after completing the PSD to WordPress conversion. There is still so much to learn. Now, it is the time to evaluate the work of your website. This step is important to ensure that everything is perfect and nothing is broken.
Here’s what you should check:
➔ Is your site mobile-friendly?
➔ Are all the links functional?
➔ How fast is your website?
There are tools for checking a site’s speed and potential issues, such as Google PageSpeed Insights. When a website loads faster, it gives utter satisfaction to the users. In turn, Google ranks such sites at the top of SERPs.
Pro Tip: Evaluate the functionality of your website on different browsers like Mozilla Firefox, Google Chrome, and Safari. Sometimes, the website behaves differently depending on the browser in which it was created and developed.
Step 8: Launch and Maintain (Your Website Is Alive!)
Congratulations! It’s time to make your website live. But remember that launching is the first step you must start with. Content in a website needs to be refreshed periodically; likewise, the website needs backend updates to be safe.
➤ Update WordPress Regularly: New updates have security fixes and enhancements that allow your site to function properly.
➤ Back up your site: Use plugins such as Updraft Plus to back up your site frequently. You should not risk losing all that you have worked for!
➤ Check performance: Test and improve performance and guarantee that your site remains fast.
Ever want to avail yourself of the services of a PSD to a WordPress service provider? If yes, ensure that they offer post-PSD to WordPress support services. This way, if there are any bugs or revisions, you can get it done in no time!
Must Read: How PSD to WordPress Conversion Services Save Web Design Agencies Time and Money
Conclusion: Yes! You Have Done It!
Transforming a PSD design into a responsive WordPress website might seem complex without prior guidance, but it is very easy, even for a novice, when done step by step. After being made responsive and connected to WordPress, you started with a PSD file and created something strong that can work on any device.
Still worried about what would happen if you ever face bugs later on? Don’t worry; you can always contact a reputed PSD to WordPress service or a professional WordPress development company to help you with the more complicated steps involved in the process.

Prince Jadiya holds the position of Chief Marketing Officer at Psdtohtmlninja.com, where he assists organizations in overcoming web development obstacles. He is also known for him informative and engaging blog posts.
Couldn't find what you were looking for?
Let us know how we can help!
Related Blog Posts