Table of Content
Converting a Figma design into a stunning WordPress website is a vital and regular task for a web designer and developer.
As we know, Figma allows one to create amazing visuals easily. On the other hand, WordPress is a popular and powerful CMS or Content Management System. Both these platforms are used to create professional websites.
Today in this detailed guide, we will learn some effective ways to convert Figma designs into WP websites so that one can bring those stunning designs to life. Let’s get started.
Why Should You Convert Figma to WordPress? [Comparison Table]
If you're still wondering whether it’s worth converting your stunning Figma design into a fully functional website, this table clears the air. Here's how this conversion bridges the gap between creative vision and real-world execution:
| Reason | What It Really Means |
|---|---|
| Pixel-Perfect Precision | Your website will mirror your Figma design down to the last pixel — no design elements lost in translation. |
| Faster Go-to-Market | Cut down on back-and-forth between design and development. Get your site live sooner with fewer hiccups. |
| No Guesswork for Developers | Developers don’t have to interpret your design — they follow a clear blueprint, speeding up the build. |
| Smart Prototyping | Turn static mockups into interactive pages quickly. Ideal for client reviews or testing functionality early. |
| Total Design Freedom | WordPress is highly customizable — you’re not boxed into a theme. Your Figma design can actually come to life. |
| Future-Friendly Updates | Content or style changes? No problem. With WordPress, tweaks are a breeze — no need to touch the code. |
| Unified Brand Experience | Your branding remains consistent across all pages, devices, and screens — just as your designer intended. |
| Mobile-Ready by Default | Conversion ensures responsive layouts, so your design looks stunning on desktops, tablets, and phones. |
| Scalable and Extensible | Start small and grow big. Add plugins, eCommerce, or blog features whenever you need them. |
6 Best and Effective Figma to WordPress Conversion Ways
Here are the top six most effective methods to convert Figma to WordPress websites. Whether you're just starting out or have some experience under your belt, there’s a method for everyone—ranging from quick, no-code solutions to more advanced developer-friendly approaches. Let’s explore each one to see which suits your needs best.
Method 1 (Our Recommended One): Hire a Professional for Figma to WordPress Conversion
Let’s face it—Figma designs are stunning, but they don’t magically turn into websites. If you want your design to function as beautifully as it looks, hiring a WordPress expert is the smartest move.
A skilled WordPress professional or agency can take your Figma file and turn it into a fully responsive, SEO-optimized, and easy-to-manage website—without breaking things or breaking your brain trying to DIY.
This is the go-to method for businesses, creators, or agencies that value quality and don’t want to deal with the technical stuff.
What Makes This Method the Best?
When you hire a pro like us, you’re not just paying for code—you’re getting:
| Feature | Description |
|---|---|
| Flawless Design Accuracy | Your Figma layout comes to life exactly as envisioned, no design compromises. |
| Clean, Custom Code | Developers build it from scratch, so it runs faster, smoother, and more securely. |
| Responsive by Default | Your site will automatically adjust to all screen sizes, from mobile to widescreen. |
| SEO-Ready Foundation | Clean structure and semantic HTML give your site a better chance of ranking higher. |
| Worry-Free Management | The website is easy to update and scale, no matter how your business grows. |
Our Simpler, Friendlier 5-Step Process
We’re keeping it as simple as your morning coffee routine. Here’s how it usually goes:
- Share Your Figma Design
Just send a link—no extra formatting needed. - Discovery & Planning
The team reviews your design, understands your goals, and sets a plan. - Design to Development
Developers turn the visuals into a live, interactive WordPress site. - Preview & Polish
You get to review the draft and suggest any tweaks. - Launch Day!
Once approved, your site goes live—and you're ready to shine online.
Pros & Cons of Hiring a Professional Figma to WordPress Conversion Service Agency
| Pros | Cons |
|---|---|
| Hassle-free, hands-off experience. | May take more time than DIY builders. |
| Expert-level code quality and performance. | You’ll need to find a trustworthy, experienced developer or agency. |
| Fully custom and scalable. |

Method 2: Using Figma Plugins & AI Tools
If you're looking for a quicker, semi-automated way for Figma to WordPress conversion, AI-powered plugins and tools can be a great starting point—especially for beginners or those working on tight deadlines.
However, while these tools offer convenience, they do come with certain limitations. Let’s explore what they offer, how they work, and whether they’re right for your Figma to WordPress projects.
What Are Figma to WordPress Plugins?
Figma plugins designed for WordPress bridge the gap between design and code. Instead of building your site manually, these tools help generate HTML, CSS, or block-based code that can be imported directly into WordPress.
Some even integrate with page builders like Elementor, Bricks, and Gutenberg to speed up the process further.
These plugins typically follow this process:
1. You install the plugin in Figma.
2. Connect your WordPress site using an API token or design link.
3. Export the design as a WordPress-compatible format (page layout, blocks, or even full templates).
4. Import into your WordPress site.
Pros and Pitfalls of Using Ready-to-Use Figma to WordPress Plugins
While the automation sounds tempting, here’s a realistic view of what to expect:
| Pros | Cons |
|---|---|
| Quick design-to-code export | Often struggles with complex layouts |
| Saves development time for basic layouts | Limited customization or SEO features |
| Ideal for prototyping or MVPs | May require manual tweaks post-import |
| Some support responsive design & images | Security risks with lesser-known plugins |
Common Challenges with Plugin-Based Figma to WordPress Conversion
- Not Fully Functional: These tools often convert the visual parts of your design but not the functional aspects—like forms, search bars, dynamic content, or menus.
- Responsive Design Gaps: Some plugins may not automatically make your site mobile-friendly.
- SEO & Performance: Most auto-generated code is not optimized for SEO or speed, which affects rankings and user experience.
- Security Risks: Free plugins without updates or vetting can expose your site to vulnerabilities.
Still Thinking of Going This Route? Use These Popular Plugins:
Here are a few plugins we’ve tested that can help with plugin-based Figma to WordPress conversion
1. UiChemy
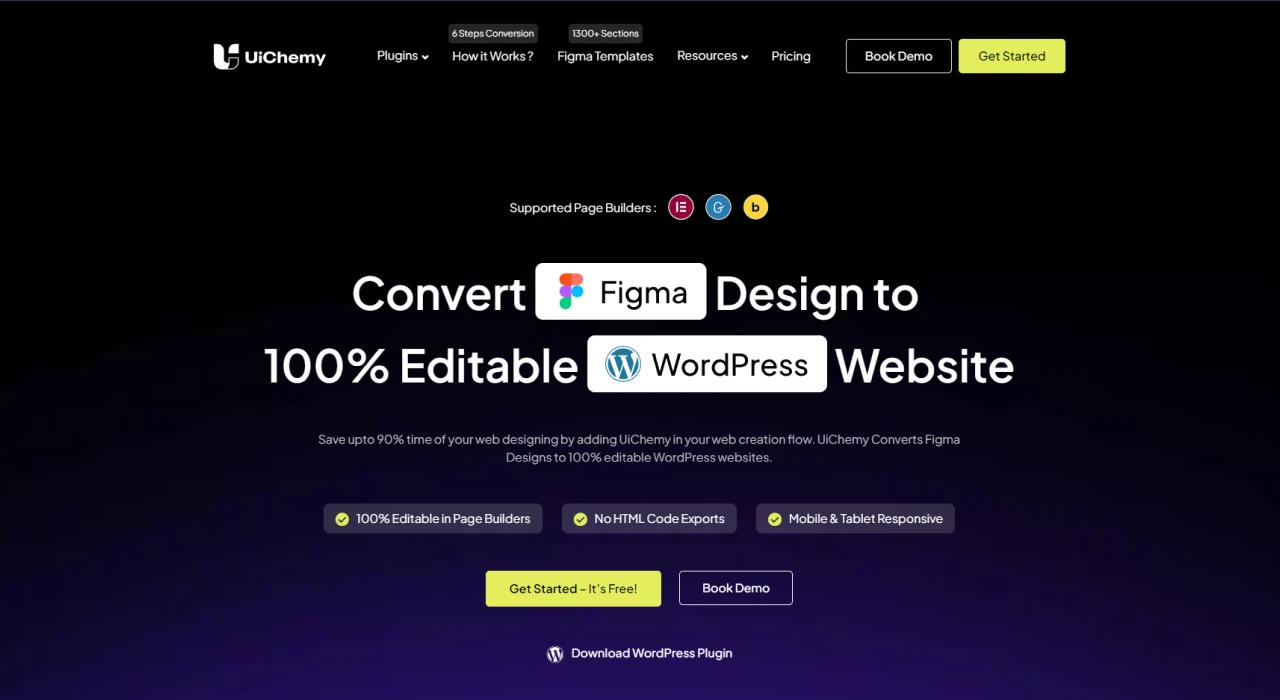
What it does: Converts Figma designs directly into WordPress pages or page builder templates (Elementor, Bricks, Gutenberg).
Why it's great:
- Works with multiple builders
- Offers design accuracy up to 90-95%
- Includes Figma template library
- Built-in optimization suggestions
Things to note: You’ll need to follow specific Figma layout rules (like Auto Layout) for accurate conversion.
2. WPLandings
What it does: Imports Figma designs as responsive WordPress pages with minimal setup.
Why it's great:
- Designs are responsive by default
- Auto-uploads images to WP media library
- Guides you through design prep before import
Things to note: Some designs may still need fine-tuning after import.
3. Figma to WordPress Block + Advanced Addons
What it does: Converts Figma designs into HTML for WordPress block editors.
Why it's great:
- Quick HTML export without token setup
- Pairs with Advanced Addons plugin to auto-import media
- Compatible with Kadence and Spectra blocks
Things to note: Some manual steps are still required, and animations aren’t supported.
4. Yokato
What it does: Yokato is a Figma plugin designed to convert your UI designs into production-ready HTML, Tailwind CSS, and React components—making it a great tool for developers looking to bridge the gap between design and frontend code.
Why it's great:
- Generates clean, developer-friendly code
- Ideal for teams working on custom themes or headless WordPress projects
- Offers real-time previews and component-level export
- Helps maintain design consistency with token-based styling
Things to note: Yokato isn’t a direct Figma-to-WordPress converter—it’s best for devs who want design-to-code output they can manually integrate into WordPress themes or custom builds.
Is This Method Right for You?
If your goal is to test an idea quickly, build an MVP, or save on upfront costs, plugins and AI tools can be a great start. But for custom websites, dynamic functionality, or serious SEO goals, it’s better to consider a developer or agency-based approach.
Method 3: Using Manual HTML Process
This is a traditional yet reliable way to convert Figma to WordPress. It involves coding the design into CSS and HTML manually. However, this method requires a high level of coding expertise, but it offers better customization and control over the implementation of the design. Now, let’s understand the procedure.
Obtain Figma Templates
First of all, log into your Figma account and obtain the HTML templates. Then create the desired designs and convert them to HTML designs. You can also use Plugins like Anima to create CSS or HTML code for design.
Creating CSS/HTML Code
With the help of a code editor, such as Visual Studio Code, create CSS/HTML code manually. Once done, test the files.
Convert the File into a WP Theme
Once you are done with creating HTML files, it’s time to convert them into a WP theme. For this, it is important to ensure proper integration of PHP code.
Steps You Need to Follow to Convert Figma to WordPress Using HTML Code
#1. Create A Development Space
First, create an MMAP or XAMPP local development environment on the computer. This allows you to edit files securely without affecting the live site.
#2. Make a New Theme Folder
Go to wp-content/themes and make a new folder for the theme. Rename it using a name related to the design and export your design assets to it. Refer Figma Learn to understand detailed Procedure.
#3. Create Required Theme Files
Create important files like header.php, page.php, style.css, footer.php, index.php, and functions.php files inside the new theme folder.
#4. Split The HTML Design
Divide the HTML design file into smaller parts. Look out for the repeated parts, such as the header, and keep each in its own PHP file.
#5. HTML to PHP Conversion
To create a dynamic website, convert HTML files into PHP files. During this, utilize WP template functions and tags instead of static content. For instance, to show a page title, use “the_title(),” and for the main content, use “the_content()” to display the main content. Convert to Figma Dev Mode for easy conversion.
#6. Add Custom JavaScript and CSS Files
If the design requires custom JavaScript and CSS files, then you need to add the required files inside the theme folder. After that, utilize WP functions such as “wp_enqueue_script()” or “wp_enqueue_style()” to enqueue these files.
#7. Integrate WordPress Features
Use WP hook, plugins, and functions to add any dynamic features such as Menu, Comments, or Blog Posts.
#8. Test and Upload the New Theme
After the integration of all features, properly test the theme. While conducting the test, check the functions, elements, and styles. Prefer to run it on different browsers and devices to ensure the responsiveness of the theme.
If all elements are working perfectly, compress the new theme folder into a ZIP file and upload that to the WP website. In order to activate it, you can visit Appearance and then click on the Themes option.
This Figma to WordPress conversion method also has some pros and cons that you should consider.
Pros and Cons of Converting Figma to WordPress Manually
| Pros | Cons |
|---|---|
| Offers complete design and implementation control | Requires technical expertise |
| Manual coding can lead to better website performance | The process is time-consuming |
| Allows integration of custom features and components | Higher risk of coding errors due to manual process |
Method 4: Using Page Builders for Figma to WordPress Conversion (Elementor, Divi, Gutenberg & More)
If you're looking for a no-code or low-code route to bring your Figma designs to life, page builders are a fantastic option. These tools give you the freedom to recreate your layouts visually—no deep coding knowledge required. Most modern page builders offer drag-and-drop functionality, responsive controls, and extensive customization, making them perfect for translating static designs into dynamic WordPress websites.
Below, we’ll walk you through how to use popular page builders like Elementor, Divi, and Gutenberg to convert your Figma designs to WordPress websites.
1. Elementor
Elementor is one of the most beginner-friendly WordPress page builders. With its intuitive drag-and-drop interface, you can rebuild your Figma design directly within WordPress—no coding required.
How to Convert Figma to WordPress Using Elementor:
- Set Up Your Site
Finalize your Figma design and install WordPress (either on a local server or live hosting). Install and activate the Elementor plugin. - Create a New Page & Launch Editor
Navigate to Pages > Add New, then click “Edit with Elementor” to launch the builder. - Recreate Layouts Visually
Manually rebuild your Figma design using Elementor’s widgets. Use sections, columns, and elements like text, images, buttons, and forms to match your Figma layout. - Use Figma-to-HTML if Needed
If you prefer a shortcut, convert parts of your Figma design to HTML/CSS and embed them using Elementor’s HTML widget. - Customize & Adjust
Match your Figma styles—fonts, colors, spacing, etc.—using Elementor’s built-in styling options. - Add Interactivity
Use Elementor widgets to add dynamic elements such as sliders, popups, animations, and contact forms. - Preview & Publish
Test your page in different device viewports and click “Publish” when you’re ready to go live.
2. Divi Builder
Divi offers a powerful visual editor that makes replicating Figma designs relatively easy. While there’s no direct Figma import, Divi provides enough flexibility to rebuild even complex layouts with custom styling.
How to Use Divi to Convert Figma to WordPress:
- Install Divi Theme
Purchase and install the Divi theme. Activate it on your WordPress site. - Create a Page & Launch Divi Builder
Go to Pages > Add New, then click “Use Divi Builder.” - Choose Your Layout Approach
Start from scratch or use a pre-designed layout that matches your Figma structure. - Build Section by Section
Divi uses rows and columns to mirror design grids. Add modules like text, images, buttons, and sliders to match your Figma file. - Customize Styling
Adjust typography, colors, spacing, and sizing directly in the visual editor to get a pixel-perfect match. - Add Effects & Animations
Divi supports scroll effects, animations, and transitions to bring your static design to life. - Preview, Optimize & Publish
Use responsive preview tools, tweak for mobile, and hit publish when you're done.
3. Gutenberg (Block Editor)
Why it works:
Gutenberg is the default WordPress editor. While it lacks the visual editing flair of Elementor or Divi, it’s lightweight, fast, and native to WordPress. It’s best suited for simpler layouts or when you want to avoid relying on external page builder plugins.
How to Use Gutenberg to Convert Figma to WordPress:
- Create a New Page/Post
Go to Pages > Add New. Gutenberg will launch automatically. - Rebuild the Layout Using Blocks
Use columns, images, text, and group blocks to replicate your Figma sections. Each block acts as a design component. - Fine-Tune Spacing & Layouts
Adjust padding, margins, and alignment using Gutenberg’s block settings. - Enhance with Advanced Blocks
Use advanced plugins like Spectra, Kadence Blocks, or GenerateBlocks for more flexibility and customization. - Add Custom CSS (Optional)
For more precision, you can add custom styles via the Additional CSS section or HTML blocks. - Test Responsiveness
Gutenberg allows responsive previews. Adjust block settings for mobile/tablet views. - Preview & Publish
Once your layout matches your Figma design, hit publish and go live.
Pros & Cons of Using Page Builders to Convert Figma to WordPress
| Pros | Cons |
|---|---|
| No coding skills needed—great for beginners | May have a learning curve depending on the builder |
| Visual editing makes recreating designs easier | Can add extra code, which may slow down performance |
| Compatible with Figma-to-HTML workflows and third-party plugins | Complex designs may still require manual tweaks |
| Wide range of design elements, widgets, and modules | Not all page builders offer complete design freedom |
Method 5: Converting Figma to WordPress Using a Pre-Made Theme
Not a developer? No problem.
If the thought of custom coding or learning HTML feels overwhelming, don’t worry—this method is made for you. Using a pre-built Figma to WordPress theme is one of the easiest ways to transform your Figma design into a live website without starting from scratch.
Pre-made themes offer a plug-and-play foundation, so instead of building every page element from zero, you focus on aligning the existing layout to your Figma design. It’s like tailoring a suit instead of sewing one from raw fabric—less time, fewer headaches, and still a stylish outcome.
Why Does This Method Work So Well?
Not every project requires a full-blown custom theme. If your Figma design follows a standard structure—like a homepage with hero banners, services, testimonials, and a contact form—a good-quality theme can get you 80% of the way there. You just need to tweak the remaining 20% to match your design’s uniqueness.
This method is perfect for:
- Freelancers or small agencies with limited dev resources
- Non-technical users who want visual results fast
- MVPs, landing pages, or time-sensitive projects
- Designers who want control over visuals but not backend complexity
Step-by-Step: From Figma to WordPress with a Theme
1. Pick a Theme That Matches Your Vision
Start with a theme that visually aligns with your Figma layout. You can find thousands of professionally designed themes on platforms like:
Pro Tip: Filter by features like “Header Builder,” “One-Page Layout,” or “WooCommerce Ready” to get more relevant matches.
2. Install WordPress and Your Theme
Use your hosting provider’s one-click WordPress installer or manually upload it. Then go to Appearance > Themes and upload your selected theme ZIP file. Hit “Activate,” and your base is live.
3. Customize Like a Pro (No Code Needed)
Most themes offer drag-and-drop customization or use WordPress Customizer. Adjust:
- Branding: Add your logo, favicon, and site title
- Typography & Colors: Match fonts and palettes from your Figma file
- Header/Footer: Use theme settings or a header builder
- Page Layouts: Tweak homepage, about, contact pages to reflect your Figma sections
Need more flexibility? Use built-in page builders like Elementor, WPBakery, or Brizy (many premium themes bundle these in).
4. Create or Adapt Templates
If your Figma design includes unique sections—like a custom portfolio layout or a comparison table—you might need custom templates. Here’s how to handle it:
- Use child themes to safely modify the main theme
- Duplicate an existing template and tweak it (requires some PHP/HTML knowledge)
- Or rebuild the section visually with page builders
5. Add Interactive Features
Figma can’t add working forms, sliders, or popups—but WordPress plugins can. To match your design functionality, use:
- Contact Forms: WPForms, Fluent Forms
- Sliders: Smart Slider 3, Slider Revolution
- Galleries: Envira Gallery, FooGallery
- Popups & CTAs: Popup Maker, Elementor Pro
6. Optimize and Go Live
Before launching, don’t forget these essentials:
- Speed Optimization: Compress images (Smush), enable caching (LiteSpeed Cache), and use a CDN
- Responsiveness: Test on desktop, tablet, and mobile—adjust paddings and margins as needed
- SEO Basics: Add titles, meta descriptions (AIOSEO or Rank Math), and alt text for images
- Security: Install a plugin like Wordfence or iThemes Security for protection
Pros & Cons of Using a Pre-Built Theme
| Pros | Cons |
|---|---|
| Super beginner-friendly | May not allow full creative freedom |
| Saves time with ready-to-use layouts | Some themes come with bloated code or slow performance |
| No coding required for basic customization | Complex designs may still need custom tweaks |
| Plenty of theme options for every niche | Requires careful theme selection to avoid compatibility issues |
Method 6: Converting Figma to WordPress Using a Headless CMS Architecture
If you’re looking for ultimate flexibility, performance, and scalability—especially for complex or content-heavy websites—then going headless is the future-proof solution. It’s a bit more technical than the other methods, but it gives you complete control over both your design system and content management.
In a headless setup, WordPress is used purely as a backend (CMS), and the frontend (UI) is built using modern frameworks like React, Next.js, or Vue. This architecture decouples your content from presentation, allowing your team to work more efficiently and deliver lightning-fast websites.
What Is a Headless CMS (and Why It Works with Figma)?
A Headless CMS like WordPress (in headless mode), Kontent.ai, or Builder.io manages your content—but doesn’t dictate how it's displayed. Your frontend team pulls this content using APIs and builds the interface separately using the design you created in Figma.
Figma is ideal for headless workflows because it allows designers to tokenize design systems, create component-based UI, and deliver consistent visuals—while developers implement these using frameworks and pull content from WordPress.
Step-by-Step: From Figma Design to Headless WordPress Site
1. Define a Design System in Figma
Create a scalable design system that includes your brand’s:
- Typography
- Color palette
- Spacing and layout guides
- Components like buttons, cards, and forms
Use the Figma Tokens plugin to manage your design tokens (think variables for colors, fonts, etc.).
2. Export Design Tokens to Version Control
Export your design tokens to a GitHub repository or version control system. This helps developers sync design updates with code, ensuring long-term consistency.
Pro Tip: Use tools like style-dictionary or figma-tokens with GitHub Actions to automate token updates directly into your codebase.
3. Set Up Your Headless CMS (WordPress or Others)
Install WordPress and prepare it for headless use by:
- Using the REST API or WPGraphQL plugin to expose content
- Organizing your content using Custom Post Types or ACF (Advanced Custom Fields)
- Avoiding theme-based layout control (since the frontend is decoupled)
Alternatively, use a fully headless CMS like Kontent.ai or Sanity, which gives you cleaner content structuring and API access.
4. Develop the Frontend Using React/Next.js
Now, hand things over to the frontend team. They’ll:
- Recreate your Figma components using React or Vue
- Import your design tokens for consistent theming
- Fetch dynamic content from the WordPress CMS using REST API or GraphQL
- Deploy the frontend via platforms like Vercel, Netlify, or Cloudflare Pages
5. Keep It In Sync
Use bridges like vip-design-system-bridge to keep your Figma tokens synced with WordPress styles.
Whenever your design team updates tokens in Figma, those changes automatically flow into your WordPress-connected frontend, keeping everything visually aligned without manual tweaks.
Real-World Use Cases & Tools
| Tool | Purpose |
|---|---|
| Figma Tokens Plugin | Create, organize, and export design tokens from your Figma file |
| WPGraphQL | Expose structured WordPress data to frontend apps |
| Builder.io / Kontent.ai | Headless CMS platforms with visual content editors |
| Next.js / Gatsby | Build ultra-fast frontends that consume CMS data |
| Elementor (Optional) | Use as a fallback for static page creation or hybrid builds |
Pros & Cons of Using a Headless CMS Approach
| Pros | Cons |
|---|---|
| Ultimate flexibility and scalability | Steeper learning curve |
| Blazing-fast performance (Jamstack friendly) | Requires separate hosting for frontend & backend |
| Consistent UI with synced design tokens | Content previews may need custom setup |
| Future-proof: easier to integrate with apps & APIs | Setup and deployment can be complex for beginners |
Tips to Enhance Figma Design In WordPress
Now when you are done with importing your Figma design into WordPress. Let’s talk about an important thing, i.e., enhancing the design in the WP environment. Here are 6 essential tips to enhance your Figma designs in WordPress.
1. Use WP Customizer to Customize the Theme
Visit Appearance in the WordPress dashboard and then click on the Customize option. Configure the theme settings from there. You can change the color schemes, layout, typography, logo, etc.
2. Customize Page Content Using the WordPress Block Editor
Make or edit pages with the help of the Gutenberg WP Block Editor. Add or customize existing blocks, like images, buttons, or paragraphs, to come up with customized content. Style those blocks carefully to make them match the Figma design.
3. Explore Advanced Customizations with Page Builders
For advanced customization of pages, you can use different page builders like Beaver Builder, Elementor, Divi, Brizy, Live Composer, and more. These tools allow you to customize or design pages using a drag-and-drop feature, ensuring better control over page style and layout.
4. Fine Tume Elements Using Custom CSS
Adding a personal and impressive touch to your design gives your brand a novelty. For that, visit WordPress Customize and then go to the Additional CSS. Edit the files carefully and test them before integrating. This way, you can create an impressive design.
5. Use Custom Typography and Fonts
WordPress allows users to change fonts. Try out different custom fonts to make the website visually appealing. To install fonts, you can use plugins like Fonto. Just choose a font that matches the newly created Figma design.
6. Boost Interactivity with the Help of Plugins
A website’s functionality can be improved using different WP plugins. They allow you to add various dynamic elements, for example, forms, galleries, animation, social media icons, sliders, and more. Customize them to perfectly match the design and boost user interaction.
Also Read: Figma to WordPress Theme: The Ultimate Guide to Conversion and Its Cost
Final Thoughts: Choose the Right Figma to WordPress Conversion Method
Converting Figma designs to WordPress is no longer just a technical task - it’s a strategic move that can define your website’s performance, user experience, and brand identity.
In this guide, we explored the 6 best ways to convert Figma to WordPress, covering everything from beginner-friendly Figma plugins to advanced headless CMS setups. While plugins and page builders are great for quick turnarounds, they often fall short when you need full control, scalability, or pixel-perfect precision.
That’s why we always recommend opting for professional Figma to WordPress Conversion services. Partnering with expert developer’s team ensures your site not only looks exactly like your Figma design but is also responsive, seo-optimized, and performance ready.
Do connect with experts like PSDtoHTMLNinja for unwavering Figma to WordPress Service support and WordPress Website building. We boast a team of WordPress Experts who are highly skilled and capable of handling complex conversions effortlessly.
Feel free to reach out to us to transform your Figma Designs into a WordPress Website or hire professional WordPress Developers from PSDtoHTMLNinja who will work on your projects dedicatedly.
FAQs – Figma to WordPress Conversion
1. Can I convert Figma to WordPress?
Yes! You can convert Figma designs to WordPress using multiple methods such as page builders (like Elementor or Divi), Figma plugins, manual coding with HTML/CSS, or hiring a WordPress developer or agency for a more professional touch.
2. Can Figma designs be used for WordPress?
Absolutely. While Figma itself doesn’t build websites, it helps you create design mockups that can be translated into a WordPress theme or page using various tools and methods.
3. How do I turn a Figma design into my website?
You can export your Figma design assets (images, icons, typography), recreate layouts in WordPress using a theme or builder, and implement functionality using plugins or custom code.
4. Is Figma better than WordPress?
Not really comparable—Figma is a design tool, while WordPress is a website platform. Figma is for designing, WordPress is for building and managing websites. They work together, not against each other.
5. How to convert Figma to a website?
You can:
- Manually code the design using HTML, CSS, and JavaScript
- Use a WordPress page builder to recreate the layout
- Use Figma plugins or export tools to generate front-end code
- Hire a developer to handle it end-to-end
6. Can you embed a Figma prototype in WordPress?
Yes, you can embed interactive Figma prototypes by generating an embed code in Figma and pasting it into your WordPress page or post using the Custom HTML block.
7. Why should I hire a WordPress developer for Figma conversion?
A WordPress developer can translate your design into a fully functional, responsive, and SEO-friendly website while adding custom features, speed optimization, and security—things that DIY tools might miss.
8. Do Figma and WordPress work well together?
Yes. Figma is used to design the interface, and WordPress brings it to life. While there's no built-in integration, many tools and plugins bridge the gap effectively.
9. Do professionals use Figma?
Definitely. Figma is a go-to tool for UI/UX designers, product teams, developers, and design agencies thanks to its cloud-based collaboration, component reuse, and design system capabilities.
10. How do I integrate Figma into my website?
You can’t “integrate” it in a functional sense, but you can use Figma for visual design, then implement those designs manually or using plugins/builders in WordPress.
11. Can I publish a Figma file as a website?
Not directly. Figma is for design only. To publish your Figma design as a live website, you'll need to convert it using code, plugins, or a WordPress-based method.
12. Does Figma work for designing websites?
Yes! Figma is widely used to create wireframes, UI components, responsive layouts, and interactive prototypes before development.
13. Can I export Figma to HTML?
Figma doesn't natively export HTML/CSS, but plugins like UiChemy, Figma to Code, or Yokato can help generate code that you can further customize for web use.
14. Where can I get help with Figma to WordPress conversion?
You can find support through Figma’s help center, WordPress forums, or professional agencies. If you're looking for expert help, PSDtoHTML Ninja offers reliable Figma-to-WordPress conversion services with pixel-perfect results.

I am responsible for creating a sales funnel, attracting potential customers, and converting them into actual buyers.
Couldn't find what you were looking for?
Let us know how we can help!

Related Blog Posts