Table of Content
High-quality and stunning web designs have become very crucial in this evolving digital world. Besides, they also play an important role in user engagement and experience. Companies with intuitive website designs can easily develop trust and increase their credibility among target users.
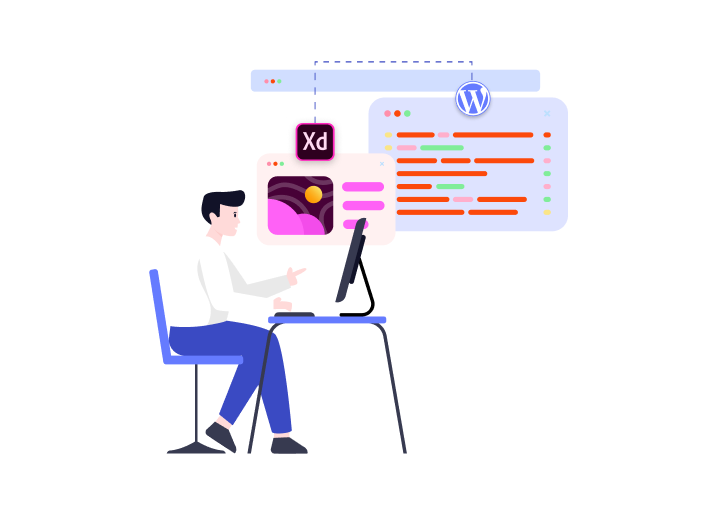
When it comes to creating beautiful designs, you can opt for a lot of options, such as PSD or Figma. However, a tool that is gaining popularity in current times is Adobe XD. It allows developers to create impressive designs that can be used in WordPress websites as themes. After all, WordPress’s useful features and global adoption encourage many businesses to migrate from Adobe XD.
However, convert Adobe XD to WordPress website can be tricky, and you may encounter some issues. Today, this detailed guide will assist you in this process. Here we have listed down the best ways and some necessary steps to follow for a successful Adobe XD to WordPress conversion. Let’s get started.
Adobe XD Design - Brief Overview
Adobe XD is a vector-based designing and prototyping tool for creating interactive user experiences in web and mobile applications. It is quite popular among website developers for its dynamic and easy-to-use web design capabilities. Its smooth collaboration and prototyping features allow users to build user-friendly and interactive designs.
Adobe XD offers all the required features to create interactive prototyping websites. When converting Adobe XD designs into a WordPress theme, the principles of UX remain at the core, ensuring an engaging and intuitive user experience for your visitors.
What is WordPress?
WordPress is one of the most trusted and versatile content management systems (CMS) available today. Originally launched as a simple blogging tool, it has evolved into a powerful platform that powers over 43% of all websites across the globe — from small business sites and personal blogs to complex enterprise portals like NASA and BBC.
With WordPress, anyone — whether a developer, business owner, or creative professional — can build and manage a website without needing to write a single line of code. It’s easy to install, runs smoothly on most servers, and gives you complete control over your site's content, design, and features.
Its true strength lies in its customization capabilities. With thousands of themes and plugins available, WordPress makes it easy to create a site that looks and functions exactly how you envision. Whether you're launching an online store, building a portfolio, or creating a news site, WordPress gives you the tools to bring your ideas to life.

Why Choose WordPress to Convert Your Adobe XD Design into a Website?
If you’ve crafted a detailed static layout in Adobe XD and are now ready to turn it into a dynamic, live website, WordPress is one of the most efficient and flexible platforms to make it happen. Here’s why it’s a smart choice:
- Intuitive Content Management: WordPress makes managing your site incredibly easy. From editing text to uploading images or adding new pages—everything can be done through a simple dashboard, no coding knowledge required. Perfect for designers, marketers, and business owners alike.
- Design Precision and Customization: Want your site to look exactly like your Adobe XD mockup? WordPress allows deep customization through themes, page builders, and custom code. Whether you're going for a minimal layout or a bold, interactive experience, WordPress helps replicate your XD vision accurately.
- Massive Plugin Library: Need to add features like a booking system, image sliders, or even a full online store? With thousands of plugins available, WordPress lets you add functionality in minutes—without starting from scratch or building complex code.
- SEO and Performance-Ready: Search engine visibility is critical. WordPress offers built-in SEO features and integrates with top plugins like Rank Math and Yoast SEO, helping your site get found on Google. Plus, it's optimized for speed and performance with caching and CDN options.
- Seamless HTML Integration: Once your Adobe XD design is exported into HTML/CSS, it can be smoothly integrated into a custom WordPress theme. This allows your front-end design to work perfectly with WordPress’s backend functionality.
- Built to Grow with You: Whether you’re starting with a small blog or launching a full-scale business website, WordPress scales with your needs. Add new features, users, or content without needing to rebuild your site from the ground up.
- Open-Source and Budget-Friendly: WordPress is open-source and free to use. There are countless free and premium themes and plugins, making it a cost-effective solution whether you’re building your first site or managing multiple client projects.
Let’s explore multiple methods to convert your XD designs into a fully functional WordPress Website.
Different Methods to Convert XD to WordPress
Converting the Adobe XD designs to fully functional WordPress websites is a skillful task and requires expert understanding. Here, we have explained all the methods in detail with all the necessary steps. Still, if you are finding the process overwhelming, you can always consult PSDtoHTMLNinja Experts and get the conversion done effortlessly.
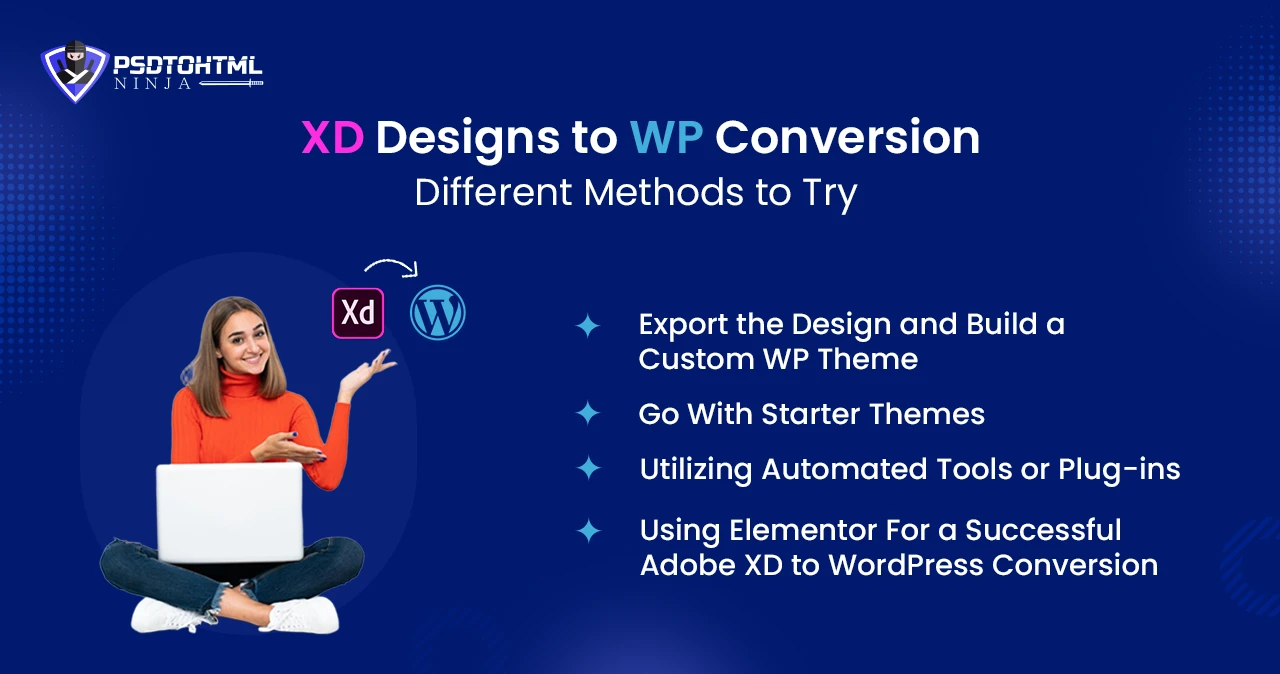
Method 1: Build a Custom WordPress Theme
You can create a custom WordPress theme by exporting the XD designs. Adobe XD lets developers export a certain amount of code based on the design. Once you are done with creating a design, you can click on the Share option and then click on the Create New Link option to export it for a custom WordPress theme.
Steps You Need to Follow
1.1 Creating Prototype
Use Adobe XD and create mockups or prototypes of a website design or layout. Carefully choose the functionalities and features you want to incorporate.
1.2 Setting Up a Development Platform
Install WordPress utilizing a trusted WordPress hosting service provider or XAMPP. Then, you need to install a code editor to edit theme files.
1.3 Setting Up Your Theme Directory
To begin with, the process, set up a new folder in the themes directory of WordPress. Rename the folder with your project name.
1.4 Setting Up Theme Files, Footer, and Header
Build all the required theme files like footer.php, header.php, style.css, index.php, etc. Then edit the header.php and footer.php files to add the header and footer section.
1.5 Edit Your Theme, if Required
Style your WordPress theme by editing the style.css. You can use different CSS techniques such as media queries, grid, or flexbox to make the design responsive. Once done, edit the functions.php file and add features such as widgets, custom fields, etc., to increase the site’s functionalities.
1.6 Test the Theme and Optimize the SEO
Test your new theme and verify that every element is working flawlessly. Then, you can start working on optimizing SEO, such as creating title tags, optimizing images, increasing page speed, etc.
1.7 Deploy The Theme
If everything is fine and working perfectly, use the theme to create a live WordPress site. Activate it and configure options based on your requirements.
Potential Issues
➔ This approach offers limited facilities, and you will not get the code you need to create a complete page.
➔ The process can be lengthy, and it is like developing a new theme for your WordPress side.
➔ Here, you need to create the Functions.php and Style.css files before using Adobe XD’s output.
➔ It also requires you to optimize the site for SEO, such as minifying JavaScript and CSS files, caching resources, etc.
Read this blog: How to Export Adobe XD to HTML: A Step-by-Step Guide
Method 2: Go With Starter Themes
Another option to consider for Adobe XD to WordPress Conversion is using a starter theme. Starter themes come with minimal design as well as layout choices, enabling developers to jump straight into the HTML utilizing the structures of the existing theme. You can also take advantage of pre-designed functionalities, styles, and templates.
Steps to Follow
2.1 Setting Up WordPress Environment
Choose a reliable web hosting provider and install the latest WordPress. Once done, install tools to edit theme files, such as Visual Studio Code.
2.2 Exporting XD Assets
Properly export the required assets such as icons, fonts, images, and other visual elements. Make sure that you have checked all design specifications such as font sizes, dimensions, etc.
2.3 Understanding Theme Structure in WordPress
Learn about the WordPress theme’s structure. It includes footer.php, header.php, style.css, functions.php, etc. You can easily find a lot of documentation and video tutorials to get started with this.
2.4 Creating Theme Files
Based on the XD design, you need to create the required theme files, including index.php, header.php, style.css, single.php, etc. You can use the templates of the started theme to structure these files.
2.5 Working on Responsiveness and Functionality
Utilize flexible layout and media queries to ensure better responsiveness. Don’t forget to test the design on different devices. Add WordPress functionality like custom post types, and dynamic menu to increase interactivity.
2.6 Optimizing Site’s SEO
Once you are done with adding the required elements and features, it’s time to optimize scripts, images, etc. Use schema markup, meta tags, URL structures, image caching, etc., to boost SEO.
2.7 Testing and Deploying The WordPress Website
Carry out detailed testing to ensure that there are no inconsistencies and errors in the design. Then you can make your site live.
Potential Issues
➔ In this method, you still need to create all the theme files like index.php, single.php, footer.php, header.php, style.css, etc.
➔ This can take time and requires WordPress development skills.
➔ It is a tedious process as you need to fill in HTML.
Read this: Sketch to WordPress Theme: A Comprehensive Guide & Its Cost
3. Utilizing Automated Tools or Plug-ins
Some tools can automate the Adobe XD to WordPress Conversion process, for example ExportKit. Besides, you can also use plug-ins, such as Yotako, to convert XD files into a WordPress theme. For personal and small development projects, using these tools can be an ideal method. However, for complex development projects, these tools may not work properly. When using them for small projects, ExportKit can automate the design-to-code process. On the other hand, using Yotako, you can convert selected designs.
Potential Issues
➔ These are not good for professional and complex projects.
➔ The results code can be unresponsive and may not meet the standards that your development team uses.
➔ Sometimes, you may face Plug-in compatibility issues.
4. Using Elementor For a Successful Adobe XD to WordPress Conversion
Both for non-developers and professional web developers, Elementor is a perfect method to convert Adobe XD files to WordPress. With this, one can transform XD designs into a fully functional WordPress theme effortlessly. The best thing is that you don’t need coding skills for using Elementor. You can also easily edit your theme just by dragging and dropping elements, like text, videos, images, titles, and more. Now, let's talk about the steps that you need to follow for XD to WordPress theme conversion.
Steps to Follow
Step 1: Preparing the Adobe XD Files
- Create your desired XD design file.
- Once done, click on the File option and choose the Save for Web or Devices option.
- Opt for PNG 24 format to maintain the quality of the file while reducing the size.
- Edit the size of images utilizing various parameters.
- Rename and save the settings.
- Save all the images in a folder to keep them organized. After that, you can create a preset. It is advisable to use Image Processor Pro for better results.
Step 2: Preparing Images and Icons
- Open a new page and edit it using Elementor.
- Now click on the Page settings and give a page name.
- Choose Elementor Canvas as your page layout.
- Ensure that the Allow navigation option is enabled.
- Now, from the Menu, select the color picker and preset colors and fonts. Elementor allows you to use a custom font or Google font.
Step 3: Change The XD Design to Elementor
- First of all, add a single column and name that column.
- Go to the Style Setting and add images that you have resized earlier.
- If required, edit other design parameters like background overlay, position, attachment, scrolling effects, etc.
- Now, add a button and edit the settings and the text as per your needs.
Step 4: Optimizing Responsiveness
- Edit margins and padding at the section or column levels to increase responsive views.
Step 5: If You Want, Repeat the Process
- Ensure that you have templates for every page. These templates can work as a foundation to create other pages. This way, you can save time as you can avoid recreating elements from scratch.
Why use Elementor for XD to WordPress Conversion?
Opting for Elementor means you will get various customization options and ensure that you have visually stunning websites.
✔️ It is intuitive, and you can see the changes you are making in real time.
✔️ Using this, you can make custom headers, footers, pop-ups, 404 pages, and more.
✔️ Elementor is well-known for supporting multiple third-party tools that will make website creation and optimization process a lot easier.
✔️ With Elementor, you can convert and make your existing Adobe XD designs into more responsive themes to work flawlessly on tablets, desktops, mobile phones, etc.
✔️ Elementor supports drag-and-drop techniques to create WordPress websites.
Well, the process is simple but there are certain points that you should keep in mind while using Elementor to avoid any issues. Read on to explore more.
Read this blog: Step-by-Step Guide to Converting PSD to WordPress with Elementor
Best Practices to Keep in Mind While Using Elementor for XD to WordPress Conversion

1. For Images, Use PNG Format
Always save images in PNG 24 format instead of SVG. This will keep the image quality high even if you are lowering the size. Besides, the PNG 24 format supports a 24-bit color palette. This will allow you to use a wide range of gradients and colors. However, if you want to utilize the SVG option, you may need to enable it on Elementor.
2. For Logos, Use SVG
SVG format is an ideal option for icons, simple illustrations, and logo creation that require to be perfectly scalable.
3. Use Custom Plug-ins to Custom Elements
While utilizing custom HTML or CSS is a good choice to boost performance, using specialized plug-ins to create custom elements can also be a great choice. For example, accordions or vertical. This will allow users to edit later. Always ensure that the plug-ins are up-to-date.
4. Consider Batch Processing
Batch-processing images can save a lot of time. For this, you can use Image Processor Pro by Adobe or Action Recording, which is available in Photoshop.
5. Prefer to Get an Elementor Pro License
Based on your elements, you may need to get a Pro license. For instance, to use elements like Slider, you need a Pro license. As it will unlock 60+ extra widgets, marketing features, dynamic content, advanced page customization options, and more.
6. Maintain Image Quality
It is advisable to choose medium quality, i.e., 40-60, to maintain a good image quality. You can also go for high image quality, but it will increase the file size and affect the website’s loading speed.
7. Avoid Unwanted Margins and Utilize Padding
When creating sections, don’t use margin. Instead, opt for padding. Padding can help in maintaining a perfect alignment of multiple items inside your design.
8. Lower the Number of Sections
Prefer to keep the number of sections in the theme as low as possible. This will enhance your website’s performance while keeping the look clean.
9. Always Test the Website
Before making your website live, test it and make the required optimization. Check all the elements and pages to make sure that they are working perfectly. Besides, check for the site’s responsiveness, broken links, and compatibility issues.
Effective Alternatives to XD Design to WordPress Theme
There are some alternatives for Adobe XD to WordPress theme with the same simplicity as Elementor. Some options are:
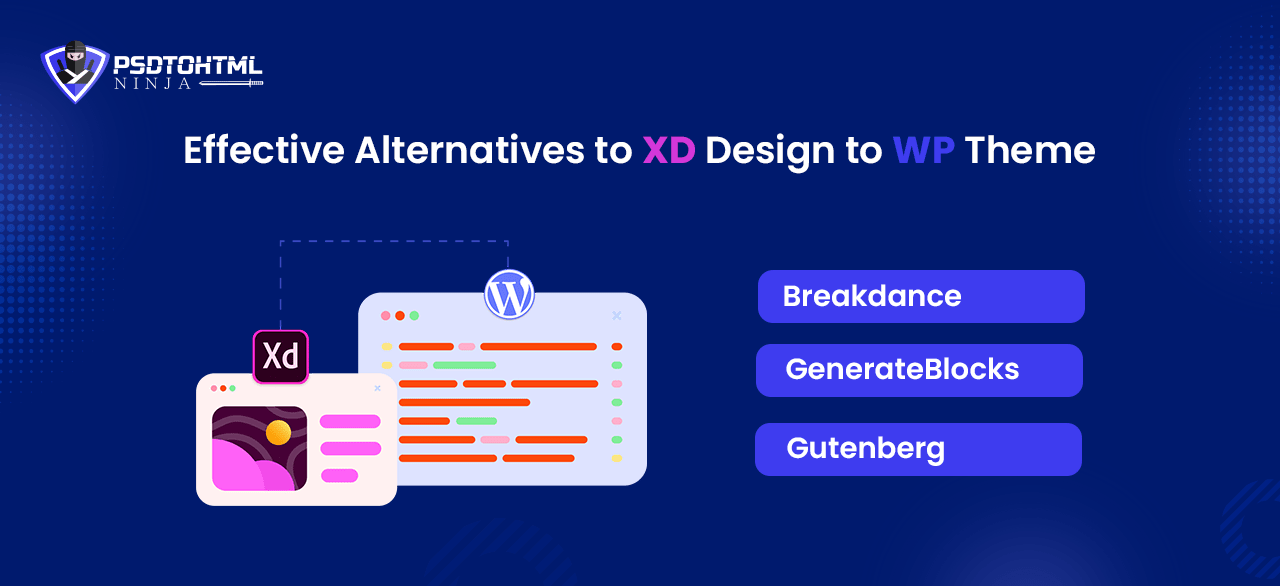
➔ Breakdance
Breakdance is a new visual builder that offers an easy way to create a WordPress theme. With its user-friendly approach, one can visually build a website using its useful features. It has more than 120 widgets (including 25+ WooCommerce widgets) and supports up to 2 third-party add-ons. Furthermore, this platform is powered by AI and can assist you with coding.
➔ GenerateBlocks
When it comes to choosing a perfect and free-to-use block editor, you can always count on GenerateBlocks. It is designed to work with GeneratePress and is also compatible with other WordPress themes. Using blocks like Buttons, Headline blocks, Grid blocks, and Container, you can create a WordPress site with maximum flexibility. It doesn’t affect the performance of the site, as minimal CSS will be created only for the blocks you want to use. Besides, it is stable and secure.
➔ Gutenberg
Gutenberg has introduced a modular approach to editing your WordPress website. This block editor allows you to edit individual blocks on pages or posts. Besides, you can also edit footers, navigations and headers. This is an excellent tool for customizing category pages, shop pages, tag pages, etc. Anyone can use it without developing coding knowledge.
Also Read: An Easy Guideline for PSD to Responsive WordPress Website Conversion
Conclusion
Undoubtedly, Adobe XD is an amazing design tool for developers. However, for an error-free or stress-free XD to WordPress theme conversion experience, taking the help of professional WordPress developers would be a smart choice. They can easily implement the code and design from XD into WordPress while maintaining the performance and security of the website. Furthermore, with them, you can take advantage of all the powerful features of Elementor to create an impressive site quickly.
Need expert assistance? Book a consultation today and let our team help you turn your XD design to life with WordPress!
XD Design to WordPress FAQs
Q. 1. How Can Adobe XD Complement WordPress Theme Development?
This tool offers an easy-to-use platform for a clear visualization of an end product. Developers can use it to build detailed prototypes or mockups. Furthermore, developers will have a clear roadmap when converting designs into WordPress themes, avoiding any confusion.
Q. 2 Is It Necessary to Develop Coding Skills to Migrate Adobe XD Files to WordPress ?
Developing coding skills is not mandatory. There are many plug-ins and automated tools that can simplify this process. However, with coding skills, you can optimize the process and add more functionalities.
Q. 3. Is It Possible to Use Adobe Fonts in WordPress?
Yes. For this you need to install a plug-in called Custom Adobe Fonts. It integrates easily with WordPress Customizer, allowing you to change fonts.
Q. 4. Which Tools Can Be Used for Adobe XD to WordPress Conversion?
While you can go for HTML to WordPress or XD to WordPress converter plug-ins, such as Yotako, etc., Elementor offers an easy way to complete the process. Besides, it allows you to customize XD designs as per your needs.
Q. 5. What Are the Potential Issues One Can Face During the Conversion Process?
Some common challenges developers may face are coding complexities, compatibility issues, maintaining fidelity and responsiveness of the design, etc. However, these challenges can be avoided by planning conversion.

Prince Jadiya holds the position of Chief Marketing Officer at Psdtohtmlninja.com, where he assists organizations in overcoming web development obstacles. He is also known for him informative and engaging blog posts.
Couldn't find what you were looking for?
Let us know how we can help!

Related Blog Posts