Table of Content
Converting a design from Figma to a WordPress site using Elementor might sound technical, but it can be quite straightforward. In this beginner-friendly guide, we’ll walk you through how to convert Figma to Elementor in five simple steps. By the end, you’ll know how to turn your static Figma designs into a live, responsive WordPress webpage with ease.
But before we dive deeper into the steps, let’s see what Figma & Elementor does!

Overview of Elementor and Figma
Figma is a popular cloud-based design tool used by web and UI/UX designers to create website layouts, mobile app interfaces, prototypes, and more. It allows multiple designers to collaborate in real time and ensures your design elements (like fonts, colors, and spacing) are consistent throughout the project. If you’ve created a website mockup or prototype in Figma, you have a pixel-perfect blueprint of how you want your site to look.

Elementor is a powerful page builder plugin for WordPress that enables you to build custom web pages visually, without needing to write code. With Elementor (available in both a free version and a more feature-rich Pro version), you can design pages by dragging and dropping elements (text boxes, images, buttons, forms, etc.) onto your page and styling them through an intuitive interface. Essentially, Elementor bridges the gap between design and development – it lets you implement your Figma design in WordPress with minimal coding knowledge.

In simple terms: Figma is where you design your website, and Elementor is where you build that design on your WordPress site. Using them together means you can plan a beautiful site in Figma, then recreate it almost exactly in Elementor.
Seek Professional Help from PSDtoHTMLNinja for Smooth Figma to Elementor Conversion

Let's be honest — converting a Figma design into an Elementor website isn't everyone’s cup of tea. If you've tried it yourself, you know how tricky and time-consuming it can get. There's no shame in feeling a bit overwhelmed by all the steps and technical details involved. Figma to Elementor conversion can be challenging, and if you're feeling stuck, you're definitely not alone.
The good news is you don’t have to tackle it all by yourself. Our team at PSDtoHTMLNinja has done this many times, and we're here to help you. We actually do Figma to Elementor conversions every day, so we've learned all the little tips and to get it done right. You can count on our experience – after countless projects, we know how to smoothly handle the whole process and avoid common pitfalls.
We can handle all the technical parts for you, from exporting assets out of your Figma file to recreating every design detail in Elementor, so you can take a sip of coffee and focus on the most important thing — expanding your business. In fact, we'll take care of things like:
- Grabbing all your images and icons from Figma and prepping them for the web
- Setting up the proper fonts, colors, and styles in Elementor to match your design
- Building out each page so the layout looks exactly like your Figma prototype
- Replicating all the little details – even subtle shadows or animations – so nothing gets lost
Sometimes it's simply easier to get a little help rather than doing it yourself. If you ever feel like you're in over your head or just want to save time, don't hesitate to reach out to us at PSDtoHTMLNinja. We're friendly folks who love helping bring designs to life, and no question is too small. If you need help with your Figma to WordPress Elementor conversion, just get in touch with us. We're always here to support you and make sure your project comes out exactly the way you envisioned, without the stress.
Preparing Your Figma Designs for Elementor
Before jumping into WordPress, it’s important to prepare your Figma file so that the conversion process is smooth. By organizing and optimizing your Figma design ahead of time, you’ll save yourself a lot of effort when rebuilding it in Elementor. Here are some tips for getting your Figma designs ready for WordPress Elementor:

1️⃣ Plan for Responsiveness
If possible, design your layout in Figma for multiple breakpoints (desktop, tablet, mobile). If you only have a desktop design, take some time to think about how the content should reflow on a smaller screen. Maybe create a quick mobile-version wireframe in Figma. This will guide you later when you adjust your Elementor design for mobile responsiveness.
2️⃣ Organize and Name Layers Clearly
A tidy Figma file helps immensely. Use frames or sections in Figma to represent different pages or different sections of a long page. Group related elements together (for example, group the header elements, group the hero section elements, etc.). Name your layers and groups in Figma descriptively (e.g., “Navbar Background”, “Hero Title”, “Product Image 1”) – this makes it easier to identify what needs to be exported or replicated. Clear structure in Figma will translate to a clearer game plan when building in Elementor.
3️⃣ Export Assets (Images, Icons, Logos)
Identify all the images in your design – such as logos, photos, icons, or illustrations – that you’ll need to use on the website. In Figma, you can mark layers or objects for export. Export these assets in web-friendly formats:
- Use PNG or JPEG for photos and complex images.
- Use SVG for vector graphics like icons or logos whenever possible.
- Make sure to export at 2x or 3x resolution if you want crisp images on high-DPI (Retina) screens, or use SVG which is resolution-independent.
- Keep file names logical so you can recognize them when uploading (for example, hero-background.png, icon-check.svg, etc.).
4️⃣ Set Up a Style Guide in Figma
Check the colors and fonts used in your design. Ideally, you have a handful of primary colors (for backgrounds, buttons, text) and maybe 2-3 font styles (e.g., a heading font and a body text font). Make sure these are defined in your Figma design as consistent styles (Figma allows creating Color Styles and Text Styles). This not only keeps your design consistent but will help when you set up global styles in Elementor to match.
5️⃣ Design Structure and Spacing
Take note of the spacing and sizes in your Figma design. In Figma’s Inspect panel, you can get pixel values for paddings, margins, and element sizes. Jot down key measurements (like the height of your header, the padding inside a section, or the exact color codes). Also note any special effects (shadows, gradients, round corners). Elementor often has controls for these (for example, box shadow or border radius settings). Having these details ready will help you quickly match the design in Elementor. Essentially, treat your Figma file as the blueprint/reference that you will frequently look at while building.
By preparing your Figma design with these steps, you set yourself up for a much easier time once you start building in WordPress.
Now that your Figma file is all set, let’s move on to the actual conversion process!
Read this blog: The Ultimate Guide To Convert Your Figma To Code
Step-by-Step Guide to Convert Figma to Elementor
In this section, we’ll break down the conversion into five major steps. Each step corresponds to a phase in the process of turning your Figma design into a live page built with Elementor on WordPress. Follow along in order, and you’ll go from static mockup to functioning website.
Step 1: Preparing Your Figma Design
The first step happens before you even open WordPress or Elementor. It’s about finalizing your design details so you have everything you need for the build. This echoes what we covered in the preparation section above, so think of this as your pre-flight checklist:
1. Review the Design Elements:
Go through your Figma file and double-check that all sections of your website are designed the way you want. Ensure you didn’t miss designing a mobile version of a tricky layout or a state for a button hover. It’s easier to adjust in Figma now than mid-build in Elementor.
2. Export All Necessary Assets:

As mentioned, export images and icons from Figma. For every image in your design, decide if it will be an actual image on the site (then export it) or something you’ll recreate with code or Elementor (e.g., a simple colored background or a box with text probably shouldn’t be an image – you’ll build that in Elementor).
3. Gather Style Information:
Write down the font names, font sizes for headings and paragraphs, color hex codes, and any other style detail (border widths, etc.). Having a small reference sheet helps when you start applying styles in Elementor. Some designers even print out or keep a PDF of the design for reference while building.
By the end of Step 1, you should have:
- A clean, organized Figma design with any adjustments made.
- A folder of exported assets (images/icons) ready to use.
- A style guide or notes on fonts, colors, and dimensions.
This preparation means you won’t have to scramble or pause frequently while using Elementor – you’ll have everything on hand. Now we’re ready to jump into WordPress!
Step 2: Setting Up Elementor in WordPress
Before building the page, make sure your WordPress environment is ready with Elementor installed and configured properly:
Have a WordPress Site Ready
Install WordPress on your chosen domain or a local environment if you’re testing. You can’t use Elementor without WordPress, since Elementor is a WordPress plugin.
Install the Elementor Plugin

In your WordPress dashboard, go to Plugins → Add New, search for “Elementor Page Builder,” and install & activate it. This gives you the base Elementor (free) version. If you have Elementor Pro (which is optional but offers more widgets and features like forms, sliders, and custom CSS), you could also upload and activate the Pro plugin at this point. Make sure Elementor is up-to-date to get the latest features.
Choose the Right Theme
For best results, use a minimalist theme that plays well with Elementor. A popular choice is the Hello Elementor theme (a bare-bones theme made by the Elementor team), which basically gives Elementor full control over the page design. You can install the Hello theme from Appearance → Themes → Add New (search “Hello Elementor”). If not Hello, any lightweight, page-builder-friendly theme works. The key is to avoid themes that impose heavy styling or restrictive layouts.

Configure Global Styles (Optional but Recommended)
After activating Elementor, you can set global colors and fonts in Elementor Settings (or via the Site Settings in the Elementor Editor). It might be good to pre-set your primary color palette and typography to match your Figma design. For example, set the body text font and heading font to the ones from your design, and define the main brand colors. This way, every time you add a heading or text in Elementor, it will default to your chosen font, saving time later.
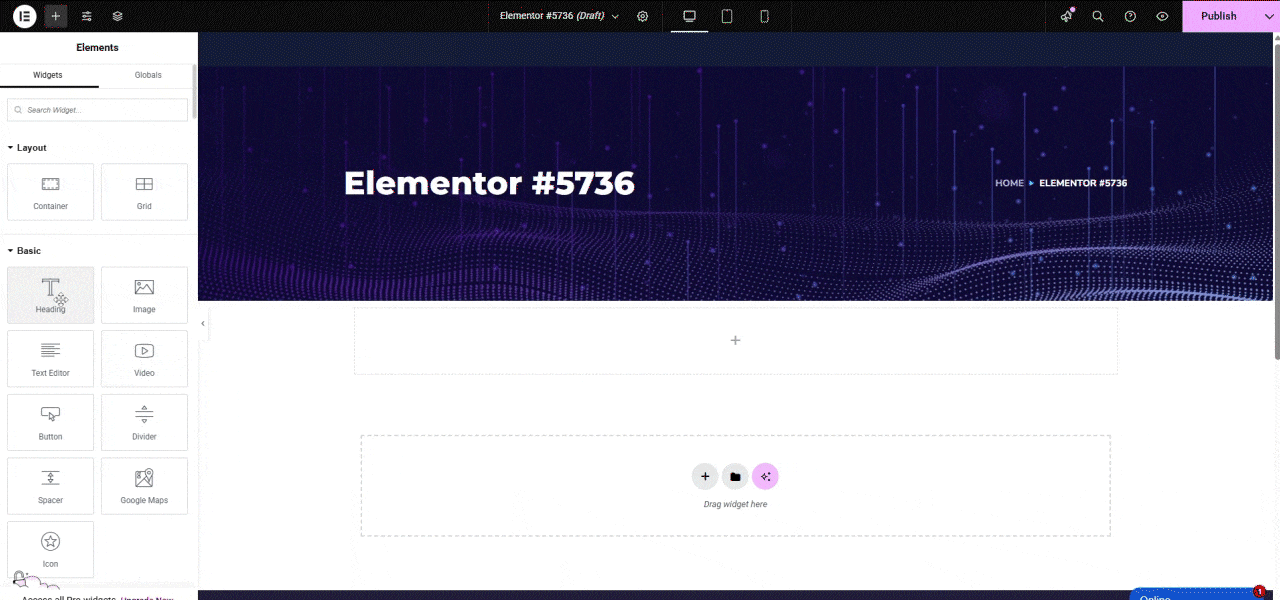
Create a Blank Page to Work On
In WordPress, go to Pages → Add New, create a page (e.g., “Home” or whatever page you’re building first). For this page, you may want to select an “Elementor Canvas” or “Full Width” template from the page attributes or Elementor settings – this gives you a blank slate without the theme’s header/footer (especially if you plan to design those in Elementor too). Then click “Edit with Elementor” to launch the Elementor visual editor for that page.
Now you have Elementor set up and a blank page open, ready for you to start rebuilding your Figma design. All the groundwork (installing plugin, selecting theme, making a new page) is done. The stage is set to actually bring in your design elements.

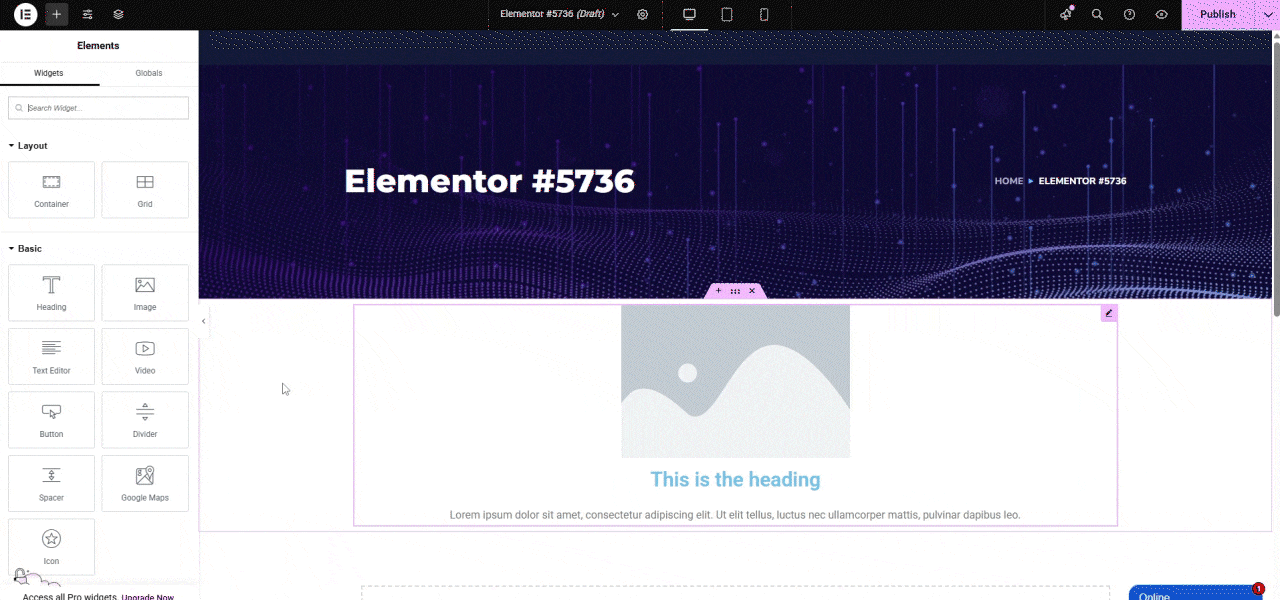
Step 3: Rebuilding the Design in Elementor
This is the core step: taking your Figma layout and constructing it in Elementor, piece by piece. Don’t be intimidated – we’ll break it down into manageable tasks:
a. Recreate the Layout Structure:
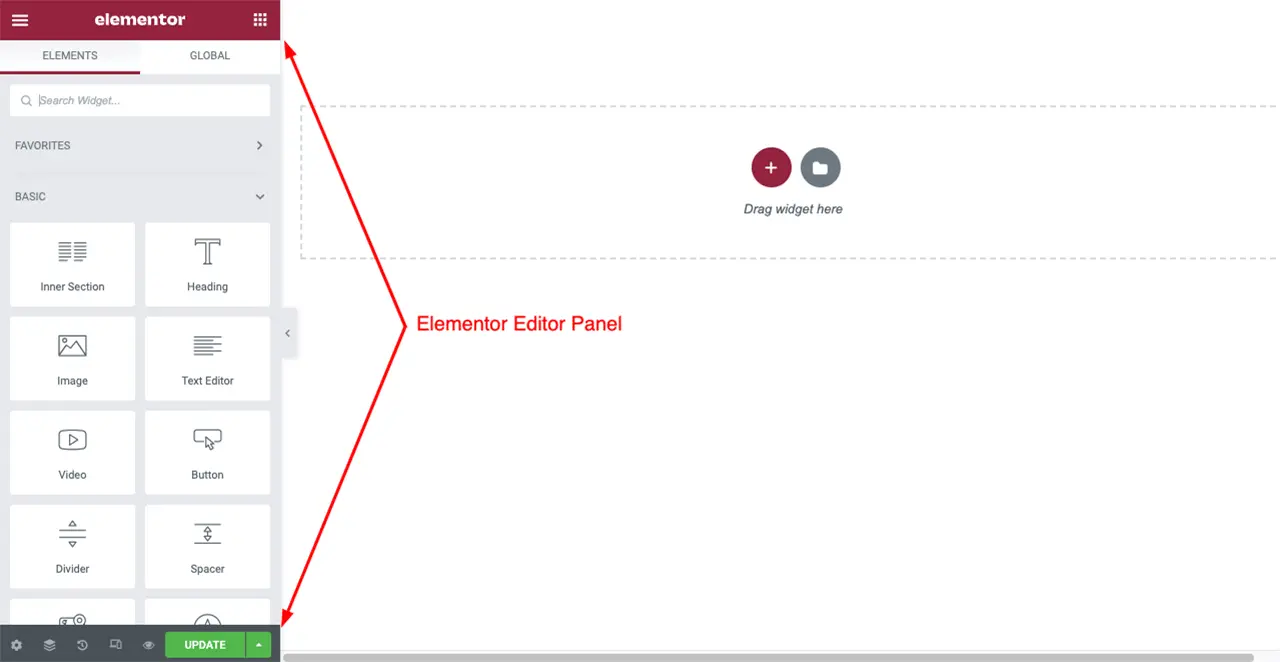
Think of your web page in terms of sections (horizontal strips of content from top to bottom). For each section in your Figma design (hero banner, about section, features grid, contact form, etc.), add a Section in Elementor. Within each section, define the necessary columns. Elementor by default starts a section with one full-width column, but you can add more or adjust column widths.
For example, if your design has a two-column layout (text on left, image on right), add a two-column section in Elementor with appropriate column width ratios (you can drag the divider to roughly match the Figma proportion, or set exact % in column settings). Structuring your page in Elementor as sections and columns that mirror your Figma frames is the first step.
b. Add Widgets for Each Design Element:
Now, inside those columns, you’ll insert Elementor widgets corresponding to each element in the Figma design:
- For headings or titles, use the Heading widget (it allows choosing heading level h1, h2, etc., and styling the text).
- For paragraph or body text, use the Text Editor widget.
- For images, use the Image widget (upload your exported image from Figma into the WordPress Media Library when prompted).
- For shapes or dividers, Elementor has widgets like Divider, or you can use the Spacer for blank space (though try to use padding/margins first).
- For buttons, use the Button widget (then style its text, color, link, etc.).
- For icons, you could use the Icon widget or add an image if you have a custom icon. Elementor has an icon library for common icons, or you can upload your SVG.
- If your design has a video or slideshow, Elementor has widgets for Video (embed YouTube/Vimeo or self-hosted) and for sliders (in Pro or via add-ons). Essentially, go through your design element by element and drop in the closest Elementor widget. This is the part where your Figma layer names and organization help – you can systematically go section by section.
c. Apply Styling to Match the Design:
After placing the basic widgets, it’s time to make them look like your Figma design.
Set Colors & Typography: Click on each widget and use the Style tab in Elementor’s sidebar to apply the correct color, font, size, and other styles. For example, set the heading text color and font size to match your design (e.g., H1 heading – 36px, dark blue color #123456 as in Figma). If you set global fonts/colors earlier, you can simply choose those presets. Ensure that font weights (bold, medium, etc.) match as well.
Spacing and Alignment: Use Elementor’s padding and margin controls to create the right spacing. For instance, if there’s more space above a section, you can add top padding to the section. If two elements need some gap, you might add a bottom margin to one or a Spacer widget. Check Figma for exact spacing values – you can often enter those numbers in Elementor. Also align text or content as needed (center, left, right) using the alignment options.
Backgrounds and Sections: If a section in Figma has a background color or image, click the section handle in Elementor, go to Style > Background, and set the color or upload the background image (and set sizing/positioning options as needed, e.g., “cover” for full-cover images). If a section’s background in Figma spans edge-to-edge in the design, ensure the Elementor section is set to Full Width (stretch section) and no extra padding on the page container (the Canvas template we chose takes care of that).
Recreate any special styles: For example, if a certain text has a shadow or a block has rounded corners or a gradient overlay, many of these can be done in Elementor’s settings. There are options for border radius (to round corners), box shadow, gradient backgrounds, etc. Use those to mimic the design details.
Build the Header/Footer (if applicable): Many Figma designs include a header and footer. If your site’s header and footer are part of the design and you want them exactly as Figma, you have two choices:
Build them manually on each page using Elementor (not ideal to repeat on every page).
Use Elementor’s Theme Builder (Pro feature) to create a global header and footer template. This is advanced, but essentially you design the header once with Elementor and assign it across the site. For a beginner guide, you might skip theme builder and just focus on the page content, especially if this is a one-page or landing page scenario.
As you rebuild, keep Figma open side by side if possible. After styling a section in Elementor, compare it to the Figma design to ensure it looks right. Adjust until it’s as close as possible. The more precise you are with matching fonts, sizes, and spacing, the more your site will look like the original design (this is often called a “pixel-perfect” conversion).
d. Add Interactivity (if needed):
Elementor allows you to add interactions or animations if your design calls for it:
- If there are links or buttons, make sure to set the URL or section anchor that they should link to.
- For hover effects (say a button changes color on hover in the design), Elementor’s settings often have a Hover state where you can define a different color or effect.
- If your Figma prototype included things like pop-ups or modals, you might need Elementor Pro’s popup builder or a workaround (this can be complex – many beginners skip advanced interactive elements at first).
- For simple animations, Elementor has motion effects (like fade in, slide in on scroll). Use these sparingly if at all, and only if it fits what you want – they’re not necessary but can enhance the feel if the design intended some animation.
This step is the most time-consuming, but also the most rewarding. You’ll see your site taking shape in Elementor, and it’s basically like “tracing” your Figma design with live elements. Work section by section, and don’t forget you can always tweak things. Elementor has an “undo” and “history” feature if you need to revert changes, and you can save your progress.
Once you have all the sections built and styled, you essentially have a working webpage that looks like your Figma file.
Explore: Figma to WordPress Theme: The Ultimate Guide to Conversion and Its Cost
Step 4: Advanced Tips for a Perfect Conversion
By now, you have the basic page built. Step 4 is about improving and fine-tuning the site – these are advanced tips that can take your Figma to Elementor conversion from good to great:

Clean and Organize Your Elementor Structure: Use the Navigator (Elementor’s layers panel) to double-check the hierarchy of sections, columns, and widgets. Make sure you didn’t accidentally nest things weirdly (like an extra section inside a section). A clean structure makes the page easier to manage and less prone to layout glitches.
Use Custom CSS (if needed): Elementor Pro allows adding custom CSS to widgets or sections. If there’s a very specific style that Elementor’s panel couldn’t achieve, you can write some CSS code. For example, maybe you want a unique hover effect or a text style that isn’t directly available. You can give the element a CSS class and then target it in the custom CSS.
Leverage Elementor Add-Ons: The Elementor community has many third-party add-on plugins (like Essential Addons, Elementor Extras, etc.) that provide additional widgets and capabilities. If your design has a complex element that the standard Elementor widgets can’t create (for example, an elaborate timeline, advanced forms, or filters), there might be an add-on that offers it.
Optimize Images and Media: Large images can slow down your site. Even though you exported assets from Figma, ensure they are optimized for web use. You can use WordPress plugins like Smush or ShortPixel to compress images without visible quality loss. Also, only use the image dimensions you need.
Performance Considerations: Beyond images, keep an eye on how your page performs. Some tips:
- Don’t overload with too many fonts or heavy animations.
- If you used a video background or a lot of large imagery, consider lazy loading or providing fallback for mobile.
- Elementor itself is fairly optimized, but using too many widgets or nesting sections can make the page heavier. Simplicity often leads to better performance.
Consistent Global Settings: If during the build you notice you manually set a certain color many times, consider setting that as a Global Color in Elementor and applying it uniformly. Same with text styles. This way, if you ever need to tweak a color or font site-wide, you can change it in one place. It also reduces the chance of small inconsistencies (like two almost-identical shades of blue by accident).
Save Templates for Reuse: If your site will have multiple pages with similar sections, you can save a section as a Template in Elementor (right-click the section handle -> Save as Template). For example, you designed a neat testimonial section – save it so you can insert it on another page easily. This maintains consistency and saves time.
These advanced tips help ensure that the website not only matches the Figma design visually but also is optimized and maintainable. Don’t feel overwhelmed – you can implement these gradually. The key is to polish the result so it’s professional and efficient.

Step 5: Testing and Launching
Your page is built and refined – congratulations! The final step is to thoroughly test everything and then publish your site for the world to see. Here’s a checklist for testing and launching:
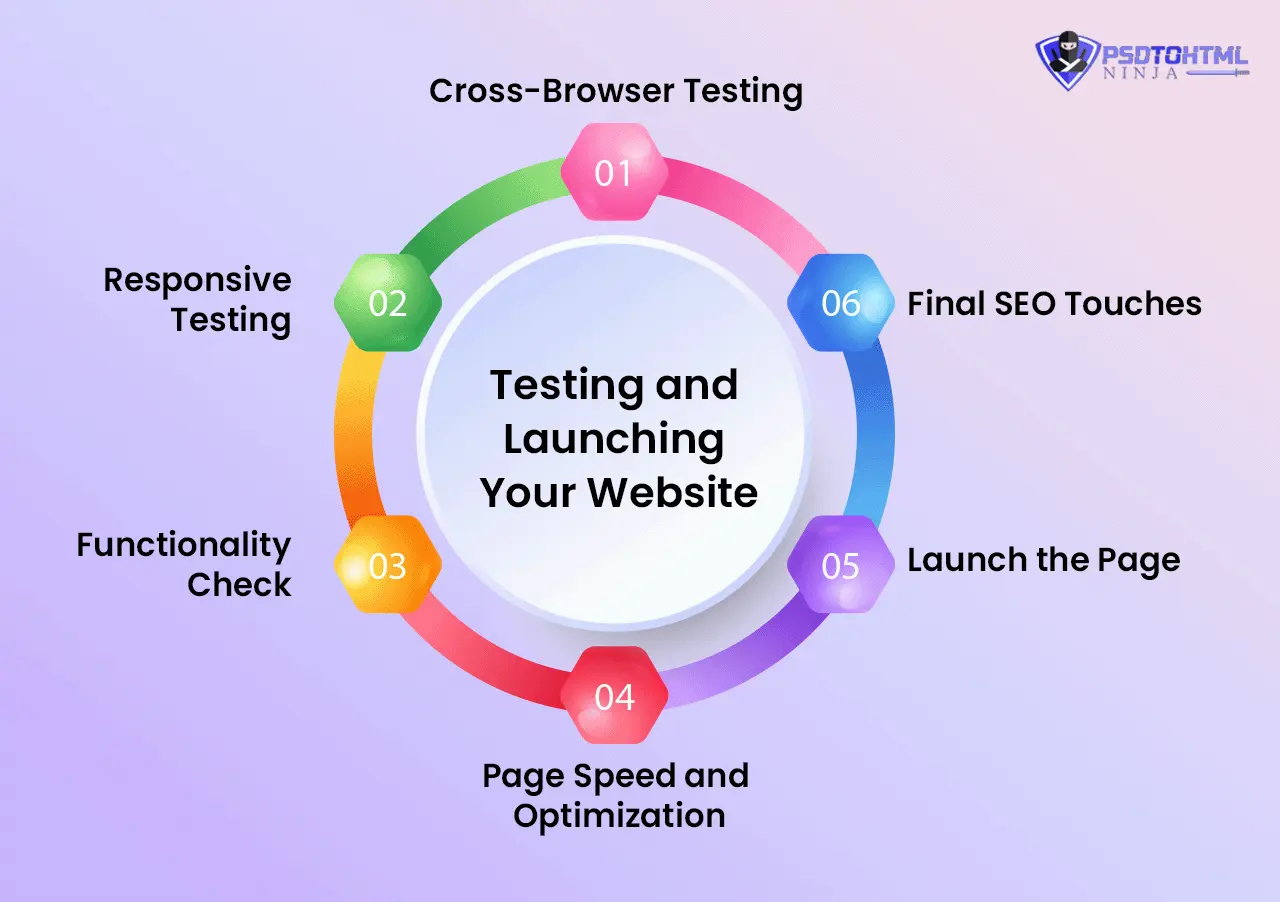
Cross-Browser Testing: Open your site in different browsers – Chrome, Firefox, Safari, Edge. Elementor’s output is generally consistent, but there can be slight differences. Ensure fonts load correctly and layouts hold up in each major browser.
Responsive Testing: Switch to Elementor’s responsive preview for tablet and mobile, and also test on actual devices if you can. Check every section on mobile view: Does anything look too cramped or misaligned? You might need to adjust font sizes or spacing specifically for mobile (Elementor lets you set different values for desktop, tablet, mobile).
Functionality Check: If your page has forms, ensure they submit properly (you’ll need to configure where form submissions go, which Elementor Pro allows). If there are links or a menu, click them to verify they go to the correct sections or pages. If you implement any animations or interactive elements, test those too (do they trigger at the right time, do they feel smooth?).
Page Speed and Optimization: This might be more advanced, but after building, you could run your page through a tool like Google PageSpeed Insights or GTmetrix. It will report if there are any obvious slow points (perhaps large images or missing performance optimizations).
Launch the Page: Once you’re happy with testing results, it’s time to go live.
Final SEO Touches: Ensure the page has a proper title and meta description (you can set these via an SEO plugin like Yoast or RankMath).
Manually Code a Website from Figma to Elementor
The 5-step process we described above uses Elementor to avoid heavy coding. However, for advanced users or for those who want maximum control and leaner code, there is a more manual workflow to convert a Figma design to a WordPress site. This typically involves translating the design into HTML, CSS, and perhaps JavaScript, and then integrating those into WordPress without a page builder. Here’s a high-level overview of that approach:

Step 1: Export and Slice Assets
Just like before, you’d export images and gather design specs from Figma. In addition, you might use Figma’s Inspect panel to get CSS properties for fonts, colors, and sizing as a starting point for your code.
Step 2: Hand-Code the Layout
Using the design as a guide, you’d write HTML markup for the structure of the page. For example, code a <header> section, <section> for each part of the page, and use CSS (or a framework like Bootstrap if you prefer) to create the layout (columns, grids, etc.). This requires knowledge of HTML5 and CSS3. You have to ensure the code is responsive (often using CSS media queries or flexbox/grid which adapt to screen size).
Step 3: Styling with CSS
You’d match the Figma styles by writing custom CSS. This means setting the correct font families (and including those fonts via Google Fonts or @font-face for custom fonts), font sizes, margins/padding as per design, colors, backgrounds, etc. Essentially you implement the Figma design in code. Modern tools like SCSS (Sass) can help organize styles, and you might use Figma’s style guide to create CSS variables or classes for consistent styling.
Step 4: Integrate into WordPress
Once you have static HTML/CSS (and JS if needed) files that resemble your design, the next step is making it work in WordPress. This could involve:
- Creating a custom WordPress theme. You’d break your HTML into PHP template parts (header, footer, page template) according to WordPress theme structure. Place the CSS and JS in the theme folder, enqueue them properly, and use WordPress functions to output dynamic content where needed.
- Alternatively, use a simpler approach like a plugin such as Insert Headers and Footers or a custom page template to add your code into a single page if it’s a one-off page.
Step 5: Testing and Tweaking
The manual approach also needs testing for responsiveness and browser compatibility. You might catch issues like a CSS not working on a mobile browser, etc., which you’d fix in code.
Also Read: How to Hire Dedicated WordPress Developer: Everything you need to know
Common Mistakes to Avoid When Converting Figma to Elementor
While converting a Figma design to an Elementor page is straightforward, beginners can run into some pitfalls. Here are some common mistakes and how to avoid them:
1. Skipping the Responsive Adjustments
A frequent mistake is building the whole page to look perfect on desktop, and forgetting about mobile until the end. This can lead to a lot of rework. Avoid this by checking the tablet and mobile views in Elementor as you build each section. Tweak font sizes and spacing for smaller screens progressively.
2. Using One Text Box for Everything
In Figma, you might have a text block with a title and paragraph together, but in Elementor (and HTML in general), they should be separate elements (e.g., an <h2> and a <p>). A newbie mistake is to paste an entire chunk of text into one Text Editor widget. This makes it harder to style the title and paragraph differently. Instead, separate your content: use a Heading widget for titles and Text Editor for body text. This way you maintain semantic structure and styling control.
3. Not Utilizing Global Styles
Elementor’s global colors and fonts exist to maintain consistency. A mistake is setting colors manually for each element (which could lead to slight mismatches and a tedious process if you ever need to change a color). Define your primary colors and fonts globally and use them – it ensures the design stays uniform and saves time.
4. Uploading Oversized Images
It’s easy to export images from Figma at the size of your artboard (which might be huge) and just upload them as-is. Oversized images will slow down your page. For example, do not upload a 5000px wide hero image when your site only needs 1920px width. Resize and compress images before or immediately after uploading. This keeps your site lightweight and fast.
5. Too Many Elementor Nesting/Sections
Sometimes beginners add sections within sections unnecessarily or stack multiple inner sections for layout tweaks. This can complicate the DOM structure and make the page harder to manage (and slightly heavier). Try to keep a clean structure: use one section for one distinct horizontal slice of the design. Use inner sections sparingly (only if you need a nested row inside a column). Often, a single section with multiple columns is enough; you don’t need a new section for every little element.
6. Ignoring Elementor’s Default Theme Styles
If you don’t use a blank canvas, sometimes the active WordPress theme might add padding, margins, or styles that confuse you (like extra space at top of page, or certain font appearing differently). Be mindful of this. Using the Hello theme or Elementor Canvas template avoids it. If not, be prepared to override some theme styles or disable them so they don’t clash with your design.
7. Not Saving Work Regularly
Elementor is pretty stable, but it’s still a browser tool and can crash or log out. A simple yet costly mistake is doing a ton of work and forgetting to hit the green Update button periodically. Always save your progress. Also, consider using Elementor’s Revision History (in the panel) to go back if something went wrong.
8. Forgetting to Test Links and Forms
You might focus so much on design that you forget that a button is supposed to link somewhere. It’s a mistake to assume “I’ll link it later” and then launch without proper links. Always double-check that all interactive elements (navigation menu, buttons, contact forms) are functional before considering the project done.
Conclusion
Converting a Figma design to an Elementor-based WordPress site is a highly approachable process, even if you’re relatively new to web design. We covered everything from prepping your design, setting up the tools, rebuilding the layout, refining it, to launching the site. By following these steps, you can achieve a professional result that maintains the original design’s integrity and works well across devices.
The combination of Figma and Elementor empowers you to go from concept to live website efficiently — Figma handles the creative design part and Elementor handles the practical building part. You end up with a site that not only looks like your vision but is also functional and editable.
That said, we understand that not everyone has the time or confidence to do this all by themselves. If you ever feel stuck or just prefer experts to take over, PSDtoHTMLNinja is here to help. PSDtoHTMLNinja specializes in converting designs (Figma, PSD, Adobe XD, you name it) into pixel-perfect, responsive websites. Our team can seamlessly turn your Figma mockups into an Elementor-powered WordPress site, while you sit back and relax. We take care of the meticulous details, performance optimization, and cross-browser quirks – delivering a final product that meets the highest quality standards.
Ready to see your Figma design in action? Follow this guide to get started on your own conversion, and if you need any assistance, don’t hesitate to reach out to PSDtoHTMLNinja. With the right approach or the right partner, your dream website is just a few steps away.
Figma to Elementor – FAQs
1. Is it possible to turn a Figma design into a WordPress website?
Yes, it’s absolutely doable. You can recreate your Figma layout in WordPress using tools like Elementor. While there’s no one-click solution, carefully rebuilding your design inside Elementor lets you bring your Figma mockups to life on the web.
Read this: Figma to WordPress: Top 3 Ways to Convert Your Figma Design into a WordPress Website
2. Can I connect Figma directly with Elementor?
Not directly. Figma and Elementor aren’t built to sync out of the box. However, you can make the transition smooth by exporting assets (like images, icons, and fonts) from Figma, and then designing your page inside Elementor using those elements.
3. Can Figma files be imported straight into Elementor?
There’s no direct import functionality. But you can export visual elements from your Figma project and manually build the layout using Elementor’s drag-and-drop tools. It’s more of a recreation process than a true import.
4. How do I convert Figma to Elementor without spending money?
If you’re working on a budget, you can manually export assets from Figma and use Elementor’s free version to rebuild your design. Stick to free widgets and styling features while recreating your layout page by page.
5. Is Elementor Pro required to build pages from Figma designs?
No, it’s not strictly necessary. The free version of Elementor provides enough tools for basic layouts and static content. However, if your Figma design includes advanced animations, forms, or theme-wide customizations, Elementor Pro can definitely make things easier.
6. Can I convert unlimited Figma designs using Elementor’s free version?
Yes, you can convert as many designs as you want. Elementor’s free version doesn’t cap how many pages you create, but you might run into limitations with more complex features or styling options.
7. Which one is better: Figma or Elementor?
Figma and Elementor serve completely different stages in the website creation process. Figma is a design tool—great for prototyping, collaborating, and laying out UI/UX design ideas. Elementor, on the other hand, is where you actually build the live website inside WordPress. They’re best used together: Figma for planning, Elementor for publishing.
8. Which is better: manually converting Figma to Elementor or using a plugin?
It depends on your goals. Manually converting your Figma design into Elementor gives you full control over layout, performance, and pixel-perfect accuracy. It’s ideal for developers or designers who want precision and flexibility. On the other hand, using a plugin can save time and effort, especially for simple websites or users with limited coding experience. However, plugins often come with limitations in customization and may generate bloated code. If quality and customization matter, manual conversion is usually the better route.

Prince Jadiya holds the position of Chief Marketing Officer at Psdtohtmlninja.com, where he assists organizations in overcoming web development obstacles. He is also known for him informative and engaging blog posts.
Couldn't find what you were looking for?
Let us know how we can help!

Related Blog Posts