Table of Content
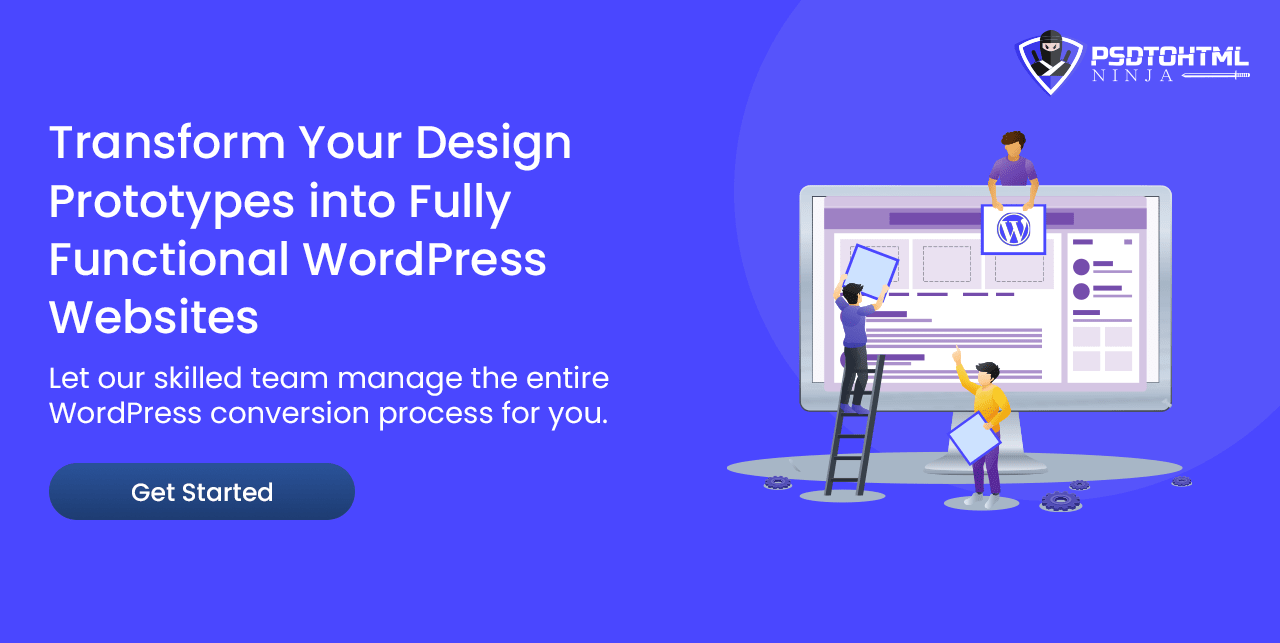
Turning your design prototype into a live WordPress site might seem overwhelming at first, but it’s not as complex as it seems. This isn’t just about recreating visuals. It’s about building something authentic that users can interact with — a site where your usrs can scroll, click, and explore.
If you're wondering where to begin, you're not alone. Every designer, developer, or creative building their first WordPress site from a prototype has stood at this starting line. The good news? WordPress is one of the most beginner-friendly platforms out there. With the right tools and a little guidance, you’ll go from static design to fully functional website faster than you think.
In this guide, we’ll walk you through exactly how to turn a prototype into a WordPress site — step by step. From prepping your design and choosing tools, to building with or without code, and finally taking it live. And unlike generic tutorials, this is shaped by hands-on experience, real workflows, and lessons learned the hard way.
By the way — WordPress powers over 43% of the web. That’s millions of websites using the same platform you’re about to build on. Whether you’re a designer, freelancer, or someone launching a personal project — this is where your vision turns real.
Let’s get into it and bring that prototype to life.
Why Converting Design Prototypes to WordPress Matters

If your wireframe is the blueprint, WordPress is the builder. Here’s why this prototype to WordPress conversion matters:
Brings Your Design to Life
Until you turn your design prototype into a WordPress site, it’s just an idea. WordPress makes it usable and accessible to the real-world.
Flexible & Beginner-Friendly
WordPress is a powerful content management system (CMS) that’s easy to use. You can update content, swap images, or add pages without touching code.
Saves Development Time
Using WordPress themes and plugins can speed up the process as you don’t need to build everything from scratch.
Built for All Devices
Prototypes look great in design tools, but WordPress ensures your final site is responsive and accessible for users on any screen.
Optimized for SEO & Growth
From SEO plugins to built-in tools, WordPress helps you get found online. Plus, there’s a huge community and plugin ecosystem behind it.
What Is a Design Prototype?

A design prototype is like a rough draft for your website. It shows how your future site will look and behave — before any code is written.
Prototypes can be simple wireframes or polished mockups with real content, images, and clickable links. They help you or your team visualize the site and test ideas before going live.
Preparing Your Design for WordPress Conversion
Before you dive into WordPress, take a bit of time to prep your design. A clean, organized prototype makes the build process much smoother.
Design Prep Checklist
- Name Your Layers Clearly: In Figma, XD, or Photoshop, rename layers and groups with clear labels — like “Header Logo” instead of “Rectangle 12.”
- Export Design Assets: Save all needed images, icons, and logos. Use web-friendly formats like PNG, JPEG, SVG, or WebP.
- Optimize Your Images: Use tools like TinyPNG or Squoosh to compress assets. Smaller files = faster websites.
- Note Fonts, Colors, and Spacing: Record font sizes, color codes, and spacing rules from your design tool. These details help recreate the look perfectly in WordPress.
- Plan for Mobile: Sketch or imagine how your design will work on phones and tablets. WordPress themes often support responsiveness out of the box, but it helps to plan ahead.
- Clean the File: Remove unused elements, duplicate versions, or placeholder graphics. A tidy prototype is easier to work from.
- Backup Your Prototype: Before making any big changes (like slicing things up), save a version of your design file. This way, if anything goes wrong or if you need to go back to the original design, you have it safe. It’s like preserving your design blueprint.
The more organized your design is, the easier the rest of the process will be. Now, let’s get into the build.
Must Read: The Ultimate Guide for Framer to WordPress Conversion
Essential 6-Step Process to Convert a Prototype to WordPress (Detailed Walkthrough)
Converting your prototype to WordPress may sound daunting, but it helps to break it down into clear steps. Below is a 6-step process, from setting up your development environment to launching the site. We’ll go through each step with beginner-friendly guidance. Ready? Let’s get started:

Step 1: Set Up a Local WordPress Environment
The first thing you need is a place to build your WordPress site. As a beginner, it’s safest to start on a local server (meaning on your own computer, not live on the internet yet). This way, you can experiment freely without visitors seeing an under-construction site.
You can use tools like XAMPP or MAMP to create a local server that runs WordPress. Another user-friendly option is Local by Flywheel (a free app specifically for spinning up WordPress locally). Install WordPress on this local setup – it’s the same process as on a live server, just all hosted on your computer. Once installed, you should be able to access a blank WordPress dashboard in your browser (usually at an address like http://localhost).
Essentially, you now have a playground where you can start building your site safely. (If setting up a local environment is tricky, you can alternatively use a staging site provided by some hosts or even a temporary subdomain online, but local is usually simplest to start.)
Step 2: Choose a Starting Theme (or Blank Slate)
In WordPress, the theme controls your site’s design and layout. You have a few routes here:
- You can pick a lightweight base theme that provides a minimal structure and then build your design into it.
- Or you can choose a theme that’s somewhat close to your prototype’s design and customize it. For example, if your prototype is a blog layout, a simple blog theme might jump-start some of the structure.
For a code-focused approach, many WordPress developers create a child theme of a well-supported theme or use a blank starter theme, then add custom styles. For beginners, using an existing theme as a framework can be easier – just ensure it’s flexible enough to match your design. Go to your WordPress dashboard, navigate to Appearance > Themes, and install/activate your chosen theme. Once activated, your site will adopt that theme’s basic look – which is the starting point.
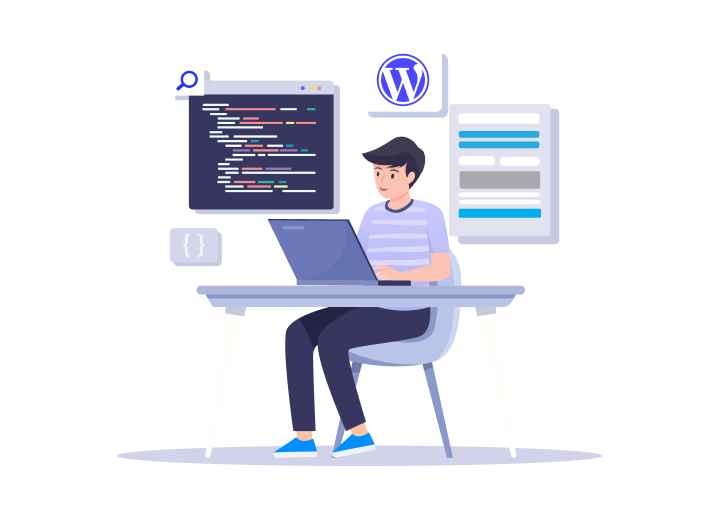
Step 3: Convert Design Elements to HTML/CSS and Implement in Theme
Now comes the hands-on part – making your WordPress theme look like your prototype. There are two main ways to do this:
- Manual Coding: This involves creating or editing the theme’s template files (header.php, footer.php, page.php, etc.) and styling with CSS to match your design. If you exported your prototype to static HTML/CSS first, you can start plugging that code into the appropriate theme files. For example, take the header section of your HTML (logo and navigation) and put that into the header.php file of your theme. Do the same for your footer with footer.php.
For the main content areas, you’ll integrate into page.php, single.php (for blog posts), or other relevant templates depending on your site. While doing this, replace hardcoded text and images with WordPress dynamic code where appropriate (more on that in the next step). Use your theme’s CSS (or a custom CSS file) to apply all the styles – colors, typography, spacing – from your prototype. It’s normal to spend a good chunk of time in this step adjusting CSS to get pixel-perfect alignment with your design.
- Using a Page Builder/Editor: If you’re not comfortable with code, you might opt to use WordPress’s visual editors here (or skip this in favor of the page builder method discussed later). For instance, the WordPress Block Editor (Gutenberg) allows some layout building via blocks. Or a plugin like Elementor could be used within your theme to design pages to match the prototype.
Whichever approach you choose, the goal in this step is to have all the pieces of your prototype translated into the WordPress theme structure. By the end of it, your WordPress site (on your local setup) should look very close to the prototype in static visuals. For dynamic aspects (like a blog list or a gallery), you might see placeholders or need to add sample content in WordPress to visualize them.
Step 4: Integrate Dynamic Content and WordPress Functionality
This is where we make sure the site isn’t just a collection of static pages, but a true WordPress site where content can be managed via the dashboard. Key tasks include:
- Using WordPress Template Tags: Go through your theme files where you hardcoded things like titles or text. Replace those with WordPress template tags/functions so they pull from the database. For example, in a blog post template, instead of a placeholder title, use <?php the_title(); ?> and <?php the_content(); ?> to dynamically show the post’s title and content. For images that might be featured images, use <?php the_post_thumbnail(); ?>, etc. This makes your pages truly editable from the WordPress admin.
- Menus and Widgets: If your design has a navigation menu, set it up using WordPress’s menu system (under Appearance > Menus in the admin). Assign your theme’s menu location to this menu so the links are managed via WP, not hardcoded. Similarly, if your prototype included a sidebar or footer widget area (like a list of recent posts or social media icons), ensure your theme has those widget areas and use WordPress widgets to populate them.
- Custom Post Types (if needed): For more complex prototypes, you might have sections that aren’t just pages or posts – e.g., a “Portfolio” section or “Testimonials”. In WordPress, you might register Custom Post Types for these to manage them separately.
- Plugins for Functionality: Identify parts of your prototype that imply functionality – e.g., contact forms, sliders, e-commerce, video players, etc. Rather than coding these from scratch, integrate WordPress plugins. For example, install Contact Form 7 or WPForms for a contact form, use an image slider plugin if you have a carousel, or WooCommerce if your prototype includes a shop.
By the end of this step, your site should not only look like the prototype but also operate like a real website. You should be able to edit content from the dashboard and see those changes on the front-end, click through a working menu, submit a test contact form, etc.
Step 5: Test, Refine, and Polish the Website
Now it’s time to put on a tester’s hat. This step is crucial for quality assurance:
- Cross-Browser Testing: Check your developing site in multiple browsers – Chrome, Firefox, Safari, Edge.
- Responsive Testing: Resize your browser or use your browser’s developer tools to simulate mobile and tablet screens.
- Performance Tweaks: A common challenge after conversion is performance – sometimes a WordPress site can load slower than the simple prototype, especially if lots of high-resolution images or heavy scripts are used. Optimize where you can.
- Functionality Check: Click every button and link on your site to ensure they go where they should.
- Content Tweak: Sometimes during testing you’ll notice small content issues – maybe a heading is too long and breaks the layout on mobile, or a certain page has less text than the prototype and looks sparse.
Step 6: Launch the WordPress Site (Going Live)
The final step is to move your site from your local environment to a live server so the world (or your audience) can access it. Here’s what to do:
Select a WordPress-Compatible Hosting Provider and Domain
Choose a reliable hosting provider that supports WordPress installations. Ensure your chosen domain is registered and ready to be linked to your hosting account.
Migrate Your Site Using a Plugin
Utilize migration plugins like Duplicator or All-in-One WP Migration to transfer your site:
- Export: Package your local site, including the database, themes, plugins, and media.
- Import: Upload the package to your live server using the plugin's import feature.
These tools simplify the migration process, handling most of the technical aspects for you.
Update Site URLs
After migration, update your site's URLs to reflect the live domain:
- WordPress Settings: Navigate to Settings > General and update the 'WordPress Address (URL)' and 'Site Address (URL)' fields.
- Database Update: Use plugins like Better Search Replace to replace old URLs in your database, ensuring all links and media points correctly.
Point Your Domain to the Hosting Server
Access your domain registrar's dashboard and update the DNS settings:
- Nameservers: Replace the existing nameservers with those provided by your hosting provider.
- Propagation: Allow up to 48 hours for DNS changes to propagate globally.
Conduct a Final Live Test
Once your site is live:
- Check Pages: Ensure all pages load correctly without errors.
- Test Links: Verify that all internal and external links function properly.
- Responsive Design: Confirm that your site displays well on various devices and screen sizes.
Announce Your Launch
With your site live and tested, it's time to share it with the world. Announce your launch through social media, email newsletters, or any other channels relevant to your audience.
After launching, continue to monitor the site for a bit. It’s wise to have a backup solution in place (many hosts do nightly backups, but plugins can allow you to backup to Google Drive or Dropbox regularly).
Bravo! You’ve successfully converted your design prototype into a WordPress website.
Using Page Builders for Faster Conversion (Elementor, Divi, SeedProd)
If you're looking to convert your design prototype into a WordPress website without diving into code, page builders like Elementor, Divi, and SeedProd offer intuitive, drag-and-drop solutions. These tools enable you to visually recreate your designs, making the transition from prototype to a live WordPress site seamless and efficient.
Why Use Page Builders for Prototype to WordPress Conversion?
- No Coding Required: Design your site visually, eliminating the need for HTML, CSS, or PHP knowledge.
- Rapid Web Development: Accelerate the build process with pre-designed templates and modules.
- Responsive Design: Ensure your site looks great on all devices with built-in responsive settings.
- SEO-Friendly: Optimize your site for search engines with clean code and SEO tools.
Step-by-Step Guide to Using Page Builders
- Set Up WordPress: Install WordPress on your chosen hosting platform.
- Install a Page Builder:
➔ Elementor: Offers a free version with essential features and a Pro version for advanced functionalities.
➔ Divi: A premium theme with a built-in builder, ideal for comprehensive design control.
➔ SeedProd: Perfect for creating landing pages and complete themes without coding.
- Choose a Compatible Theme: Opt for minimalistic themes like "Hello Elementor" or "Astra" that work seamlessly with page builders.
- Import Design Assets: Upload images, logos, and other media from your prototype into the WordPress media library.
- Recreate Your Design
➔ Use the page builder's interface to add sections, rows, and modules.
➔ Match fonts, colors, and layouts to your original design.
➔ Utilize pre-built templates and blocks to expedite the process.
- Optimize for Responsiveness: Adjust settings to ensure your site looks and functions well on desktops, tablets, and smartphones.
- Preview and Publish: Review your site, make necessary adjustments, and go live.
Common Challenges and How to Solve Them: Design Prototype to WordPress
Converting a design prototype to WordPress isn’t always a smooth ride – you might hit a few bumps. Don’t panic! Here we’ll cover some frequent challenges people face in this process and offer practical solutions or workarounds for each. Being aware of these can save you time and frustration:

1. Design Differences & Compatibility Issues
Problem: Your WordPress site doesn't perfectly match your Figma or XD prototype—fonts may render differently, and spacing might be inconsistent across browsers.
Fix: Choose a WordPress theme or builder that aligns closely with your design requirements. Utilize custom CSS to fine-tune elements, ensuring consistency. Regularly compare your live site with the prototype to catch discrepancies early.
2. Making the Site Responsive on All Devices
Problem: The site looks great on desktop but breaks on mobile—text overflows, images misalign, and layouts collapse.
Fix: Implement CSS media queries to adjust layouts for various screen sizes. Use responsive design principles to ensure elements adapt smoothly across devices.
3. Performance and Loading Speed
Problem: Slow-loading pages due to large images, numerous plugins, or unoptimized code, negatively impacting user experience and SEO.
Fix: Optimize images using plugins like Smush or Imagify, enable caching with tools like WP Rocket, and minimize the use of heavy plugins. Consider using a Content Delivery Network (CDN) to enhance global load times.
4. Browser Compatibility
Problem: The site appears differently across browsers—animations may not work, and layouts can break.
Fix: Test your site on major browsers (Chrome, Firefox, Safari, Edge) to identify inconsistencies. Use vendor prefixes in your CSS to ensure compatibility with various browsers.
5. Integrating Special Features or Functionality
Problem: Unique prototype features like interactive maps or custom animations are challenging to implement in WordPress.
Fix: Break down the feature and search for existing plugins that offer similar functionality. For instance, use Mapplic for interactive maps or AOS for scroll animations. If no plugin fits, consider custom web development or hiring experts like PSDtoHTMLNinja.
6. Content Migration and Population
Problem: Transferring existing content (posts, users, media) to the new WordPress site is tedious and error-prone.
Fix: Utilize WordPress's built-in export/import tools for content migration. For more complex migrations, consider site maintenance plugins like WP Migrate or WPvivid to streamline the process.
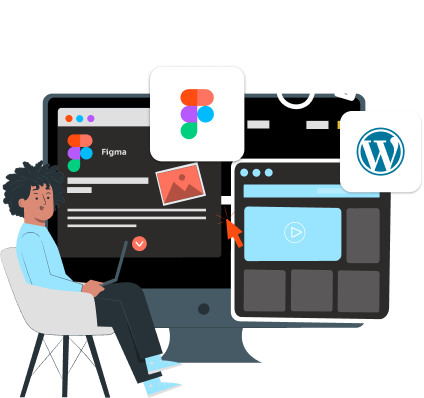
Converting Your Designs From Figma, XD, PSD to WordPress
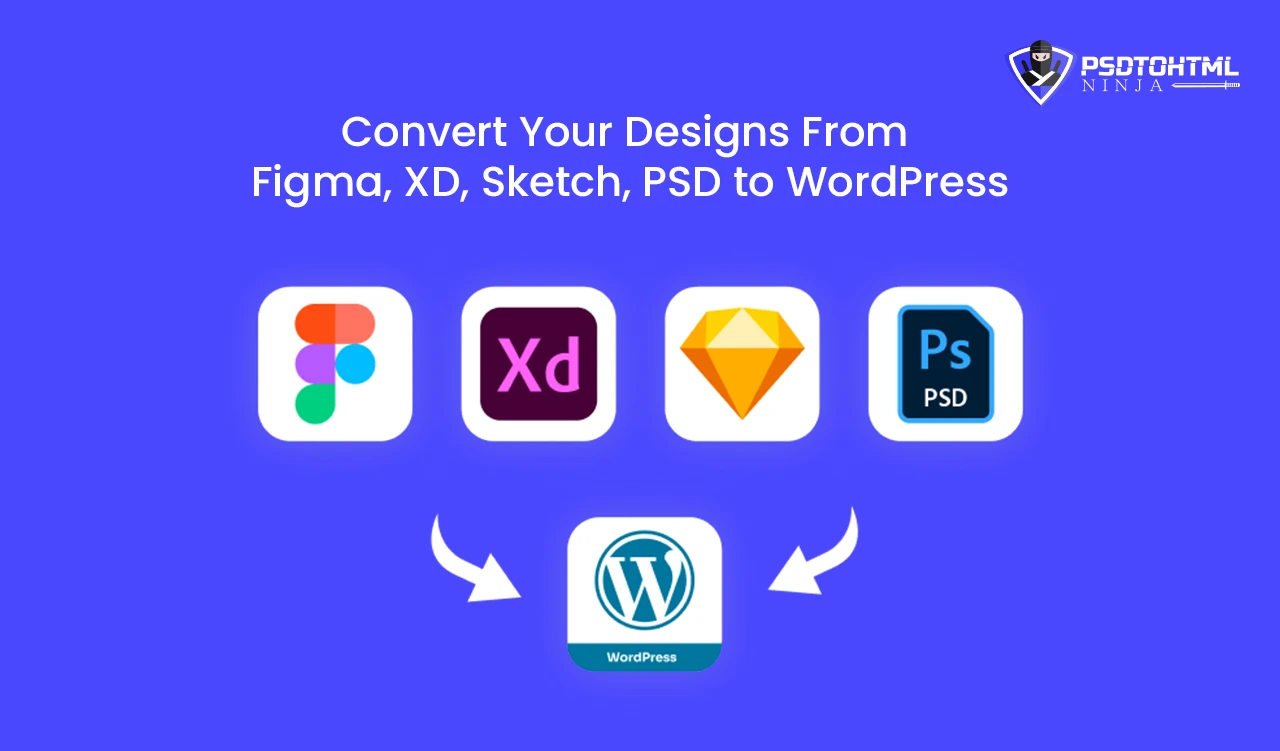
The overall process of converting a prototype to WordPress is similar regardless of the design tool. However, each design tool has its own quirks and features that you can leverage during conversion. Let’s look at some specific tips for Figma, Adobe XD, and Photoshop (PSD) prototypes, since these are common design tools:
Converting a Figma Prototype to WordPress
Figma is a powerful online design tool that many teams use for its collaboration features. One nice thing about Figma is it has a built-in code inspector – you can click on elements and see CSS attributes, which helps in copying things like font sizes, colors, spacing, etc., during your WordPress theming.
Tips for Figma to WP:
- Export Assets Easily: Figma allows you to mark layers for export. Go through your design and mark images or icons for export (set the format SVG/PNG/JPG as needed). Then with one click you can export all those assets.
- Use Figma Plugins for Code (Carefully): Figma has community plugins like Anima or TeleportHQ that claim to export code (HTML/CSS) from designs.
- Styles and Consistency: Figma’s design system features (styles for colors, text, etc.) mean your design might be very consistent. Reflect that in WordPress by using global CSS or global settings in your builder.
- Leverage Prototype Links: If your Figma prototype had multiple pages linked (like clicking a button navigates to another frame), you already have a map of your site structure. Use that to create the pages in WordPress and set up your menu accordingly. The prototype basically serves as your sitemap.
- New Tools (FYI): There are emerging tools like UiChemy that specifically aim to convert Figma designs into WordPress (Elementor or Gutenberg blocks) with minimal effort.
Converting an Adobe XD Prototype to WordPress
Adobe XD is another popular design tool for prototyping, especially for those integrated into the Adobe ecosystem. It’s similar in capabilities to Figma (minus the multi-user live collaboration).
Tips for XD to WP:
- Export Kit / Plugins: Adobe XD doesn’t natively export to HTML, but it supports plugins. A notable one is Export Kit (Lightning Storm), which can export XD artboards into HTML/CSS and even WordPress themes to some extent.
- Asset Export: Similar to Figma, mark your assets in XD for export. Adobe XD lets you batch export selected assets. Use the formats you need (SVG/PNG/etc.).
- Utilize Adobe Ecosystem: If you used Adobe Fonts, embed them via a web kit or switch to web-safe alternatives. Don’t forget to double-check licensing for web use.
- Design Specs Mode: Adobe XD has a Share feature where you can create design specs for developers. If you use that, it gives you a web link with all the measurements, CSS, and assets.
- Prototype Auto-Animate & WordPress: XD has fancy prototype animations (Auto-Animate) which don’t directly translate to WordPress. If you wow your client with a sliding animation between screens in the prototype, you’ll need to recreate that with web tech (maybe a slider plugin or custom JavaScript).
Converting a Photoshop (PSD) Design to WordPress
Photoshop was the go-to web design tool in years past (hence terms like “PSD to HTML”). You might still get designs in PSD format, especially if it’s a very visual design. PSDs are not interactive like Figma/XD prototypes, but they show the visual layout.
Tips for PSD to WP:
- Slicing and Exporting: The old-school term “slice” comes from cutting up a PSD into pieces for the web. Photoshop allows you to slice sections and export them for the web. However, nowadays you might simply hide/show layers and export assets individually.
- Use Adobe Generator: A nifty Photoshop feature is naming layers with file extensions to auto-export. For instance, if you name a layer group “hero-image.jpg”, Photoshop can automatically generate a JPEG from that group.
- Pixel-Perfect Details: PSD designs often are pixel-perfect comps. When converting PSD to WordPress, pay extra attention to measurements in the PSD. Use Photoshop’s rulers and guides, or even measure distances by selecting an area.
- Implementing the PSD in WordPress: The process will likely be manual coding or using a builder, as described. Many companies offer professional PSD to WordPress Service (like PSD to HTML); literally taking PSDs and manually coding them into WordPress themes. The PSD itself can’t be imported into WordPress – you translate it by creating a theme or using Elementor/Divi to visually match it.
- Handling Text and Effects: Photoshop might have used layer effects (drop shadows, gradients) and custom fonts. For shadows/gradients, CSS3 can often replicate those now (box-shadow, linear-gradient). For fonts, you’ll need web font versions.
- PSD to HTML to WordPress: A common path is first converting PSD to static HTML/CSS, then integrating that into WordPress. This two-step approach can be easier to troubleshoot. You design the front-end in pure HTML/CSS (maybe using Bootstrap or another framework if you prefer), and once it matches the PSD, you break that into WordPress PHP theme files.
Conclusion: Choose the Expert Agency for Prototype to WordPress Conversion
Converting a prototype into a fully functional WordPress website is no small feat—it’s a powerful transformation that turns your design vision into an interactive, editable, and scalable platform. From prepping your assets to pushing your site live, each step plays a part in building something that lasts. It’s a blend of creativity, patience, and smart tooling—and you did it (or are well on your way)!
At PSDtoHTMLNinja, we live and breathe this process. Whether your prototype is in Figma, XD, Sketch, or PSD, our team knows exactly how to translate those static screens into dynamic WordPress experiences. We’re not just here to code—we’re here to collaborate. So, if you're feeling stuck or want expert hands on deck, we’ve got you covered. Let's turn that vision of yours into something real, fast, and future-ready. Reach out anytime—we’d love to help bring your website to life.
FAQs (Frequently Asked Questions)
1. Can I convert a Figma prototype to WordPress without coding?
Yes! Use a no-code page builder or hire a pro agency like PSDtoHTMLNinja to do it for you.
2. How do I convert an Adobe XD design to WordPress?
Export your XD assets, then either code a custom WordPress theme or use a page builder to recreate the layout. Use XD’s design specs for pixel-perfect styling.
3. What is the fastest way to convert a prototype to WordPress?
You can use a page builder with a starter theme, or let experts like PSDtoHTMLNinja handle it for a quicker, high-quality result.
4. Do I need to know HTML/CSS to convert my design into WordPress?
No. Page builders let you do it without code, but knowing a bit of HTML/CSS helps if you want more control.
5. How can I ensure my WordPress site matches the prototype exactly?
Use the same fonts, colors, and image assets. Match dimensions carefully and test on different browsers for consistency.
6. Where can I get help if I get stuck?
Check WordPress forums, dev docs, YouTube tutorials, or you can hire PSDtoHTMLNinja for expert help on anything from small fixes to full conversions.

Jayveer Ker serves as the Business Development Manager at PSDtoHTMLNinja.com, specializing in assisting organizations with overcoming web development hurdles. His insightful and informative posts deliver practical solutions and valuable insights.
Couldn't find what you were looking for?
Let us know how we can help!

Related Blog Posts